May 19, 2020
Monochrome Controller
This article introduces the “Monochrome controller” which is installed only in the professional edition after Pro8. If you want to make monochrome images from color image, we hope you use the Monochrome controller in SILKYPIX.

You can download sample RAW data and try it! Download is here! (monochrome-controller.zip: 21,430KB)
Monochrome controller
Eight types “Color filters” can be selected to reproduce the filter work on the preview. In addition, you can adjust the “lightness” for each hue, and you can finish your monochrome image.
You can easily switch between color and monochrome after the application of the parameters in the preview, so it is good way to learn the effect of color change on monochrome image. The “Monochrome controller” parameter has three checks: Color filter, Lightness, and Develop as monochrome.
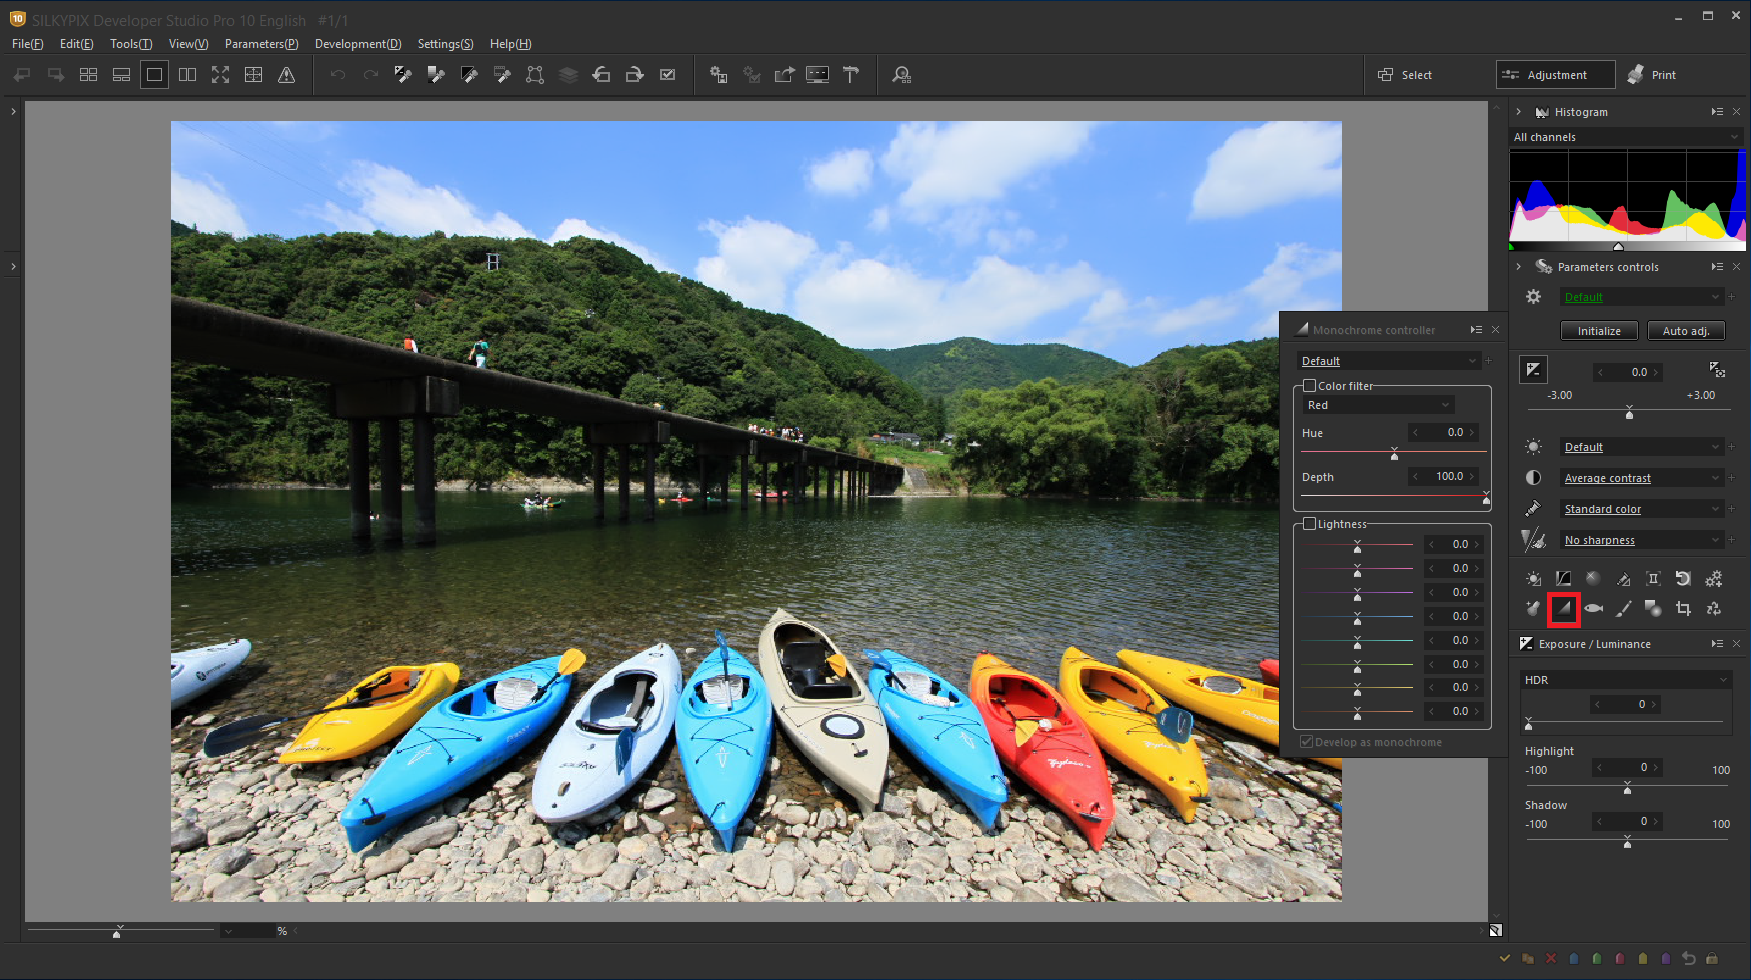
Color filter
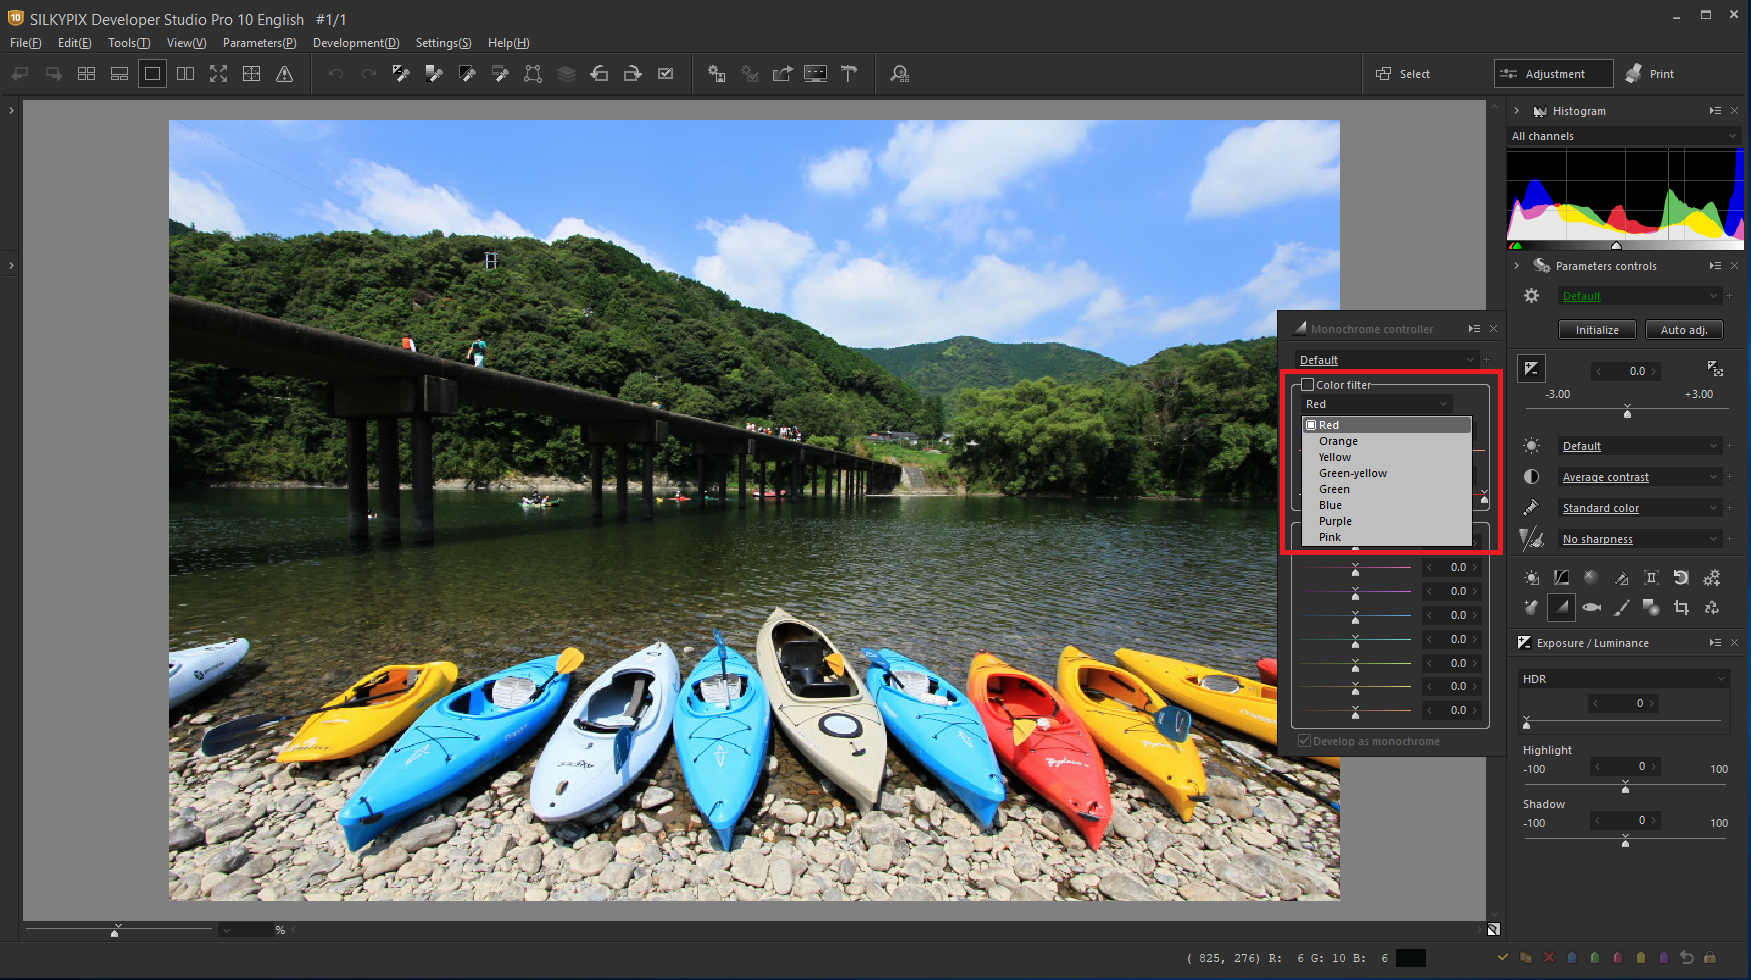
You can select each Color filter from the color filter drop-down list. Color filter has the property that subjects of the same color as the color of the color filter to be used become lighter and their complementary colors become darker.


For example, a red color filter lightens red in the image and darkens complementary blue.
The Monochrome controller allows you to select a color filter for each your image. You can also fine-tune the color by Hue or Depth after determining the Color filter.
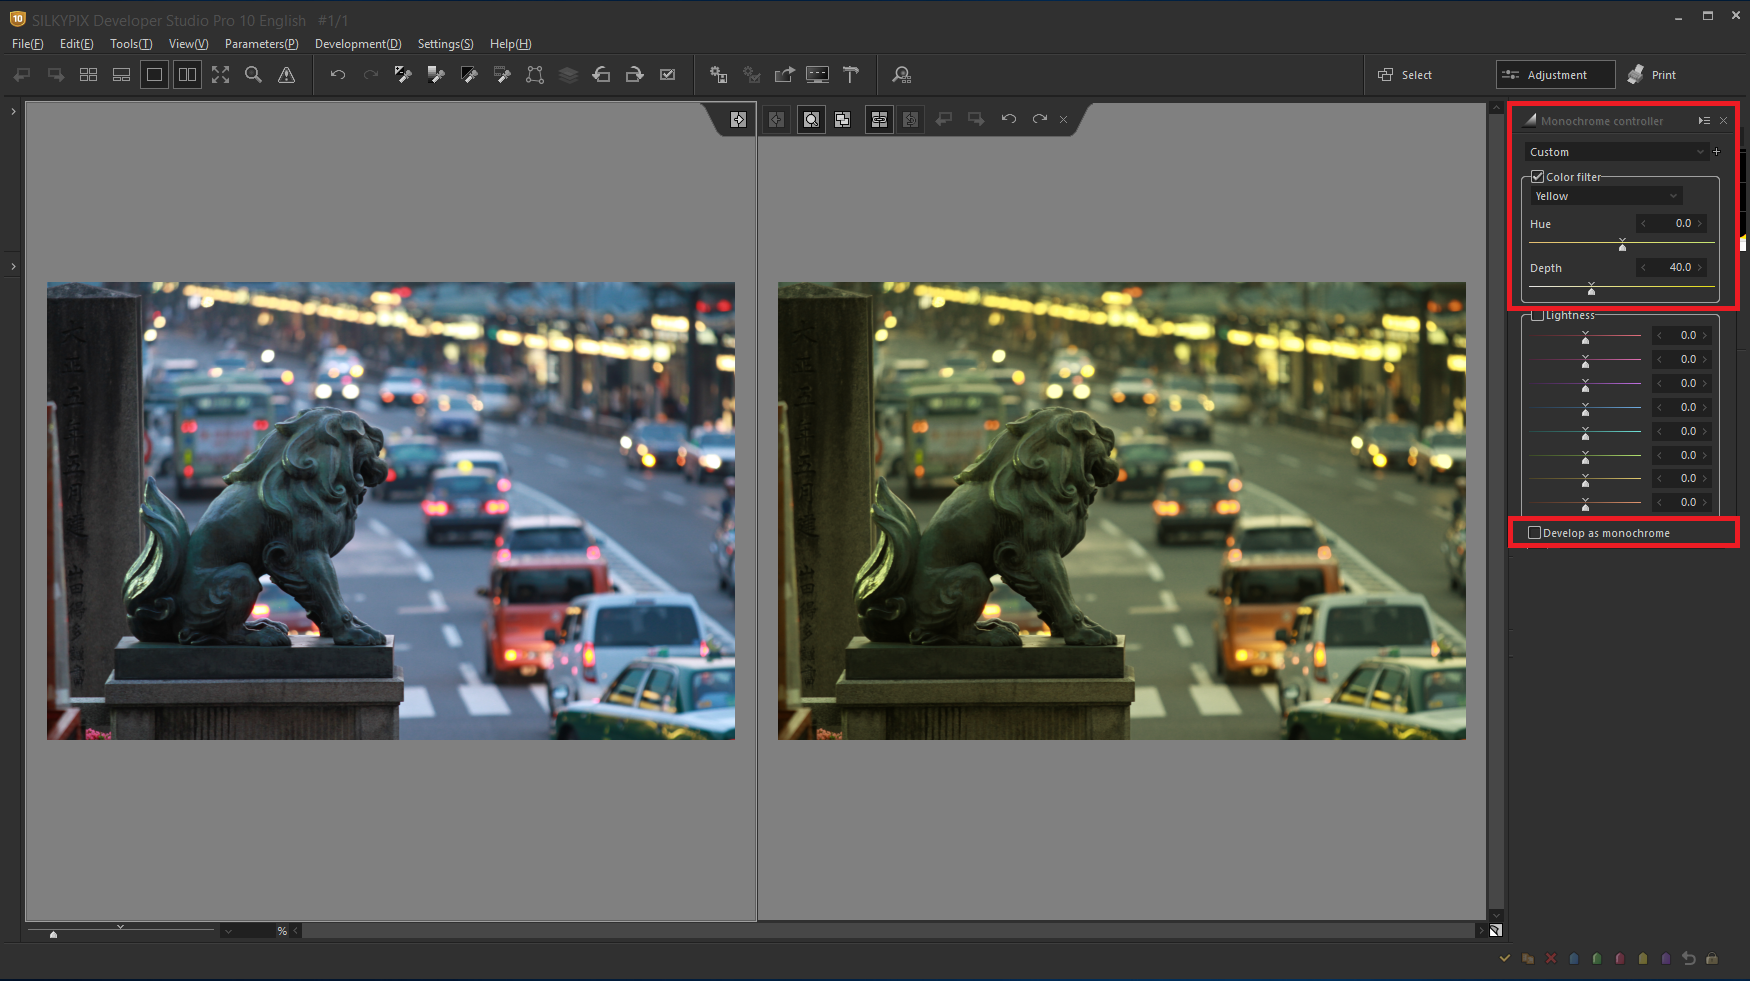
After applying the Color filter, you can apply the Color filter to a color image by deselecting the “Develop as monochrome” check box. If unchecked, the Color filter and lightness effects can be applied to color images.
Lightness
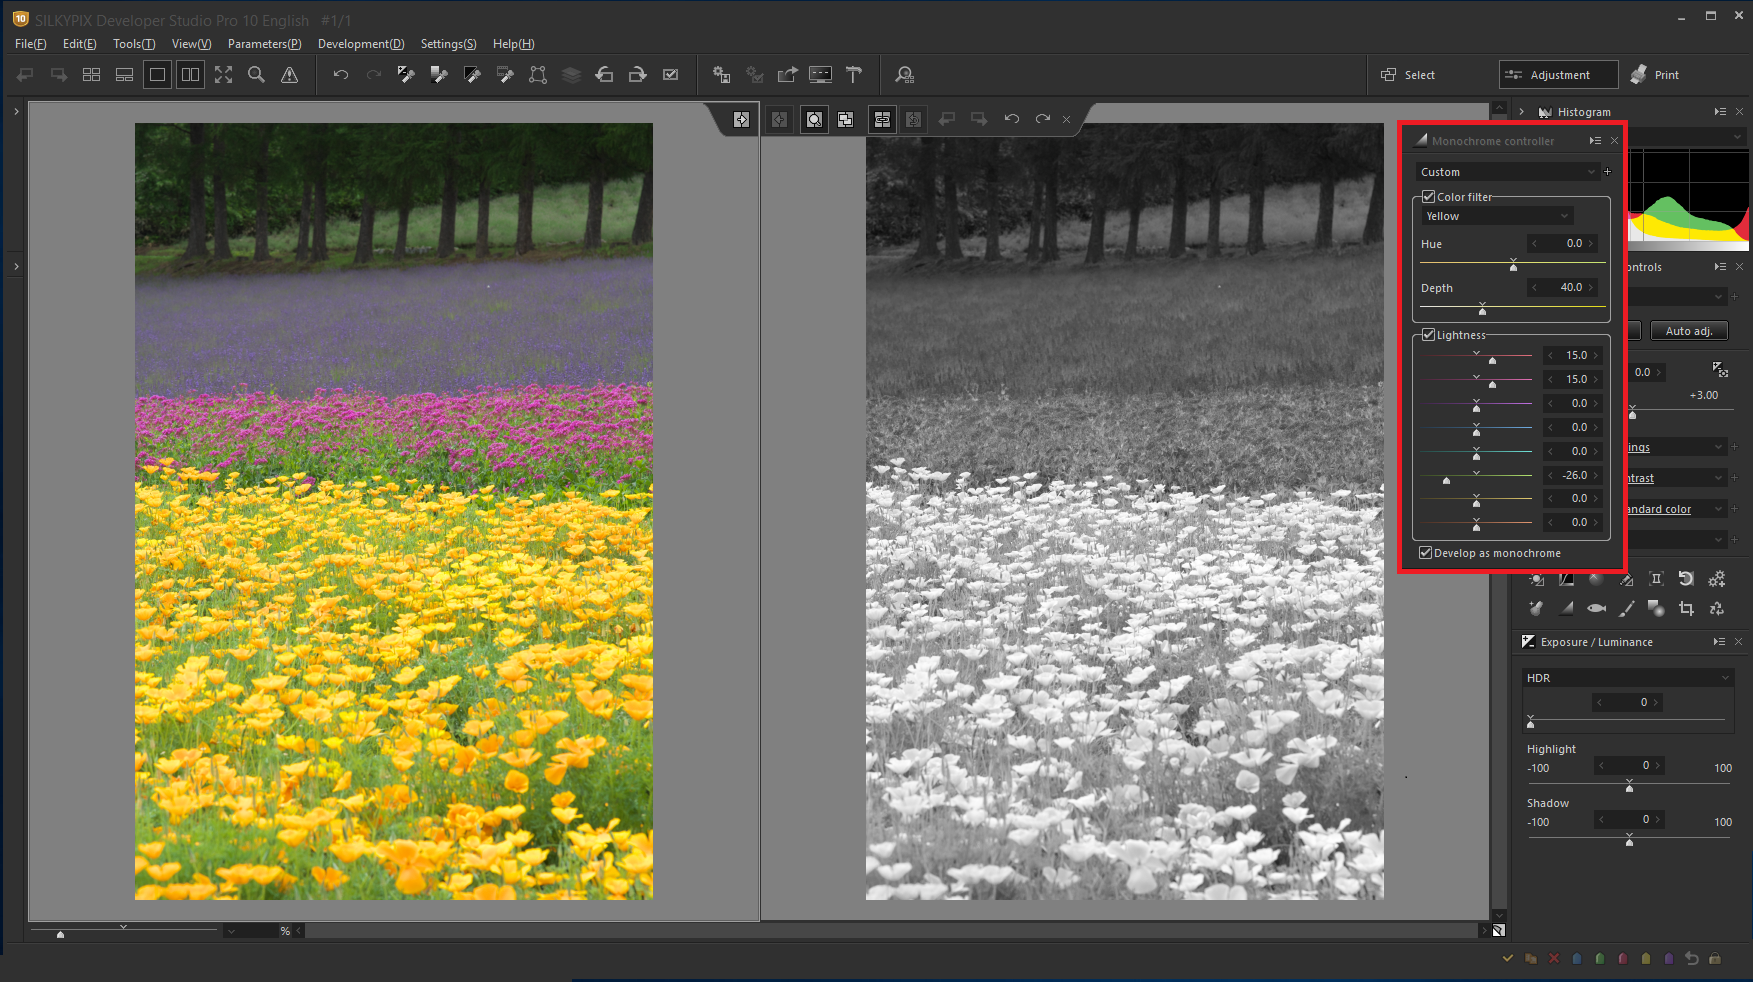
Lightness can be adjusted for each color in the Monochrome controller.
Selecting the yellow filter makes yellow flowers became white. And, I used “Lightness” to make adjustments for each color. This example is darkening the green.
Let’s use the Monochrome controller in SILKYPIX!
Let’s finish the monochrome work! Please download the sample RAW data and try it out too!
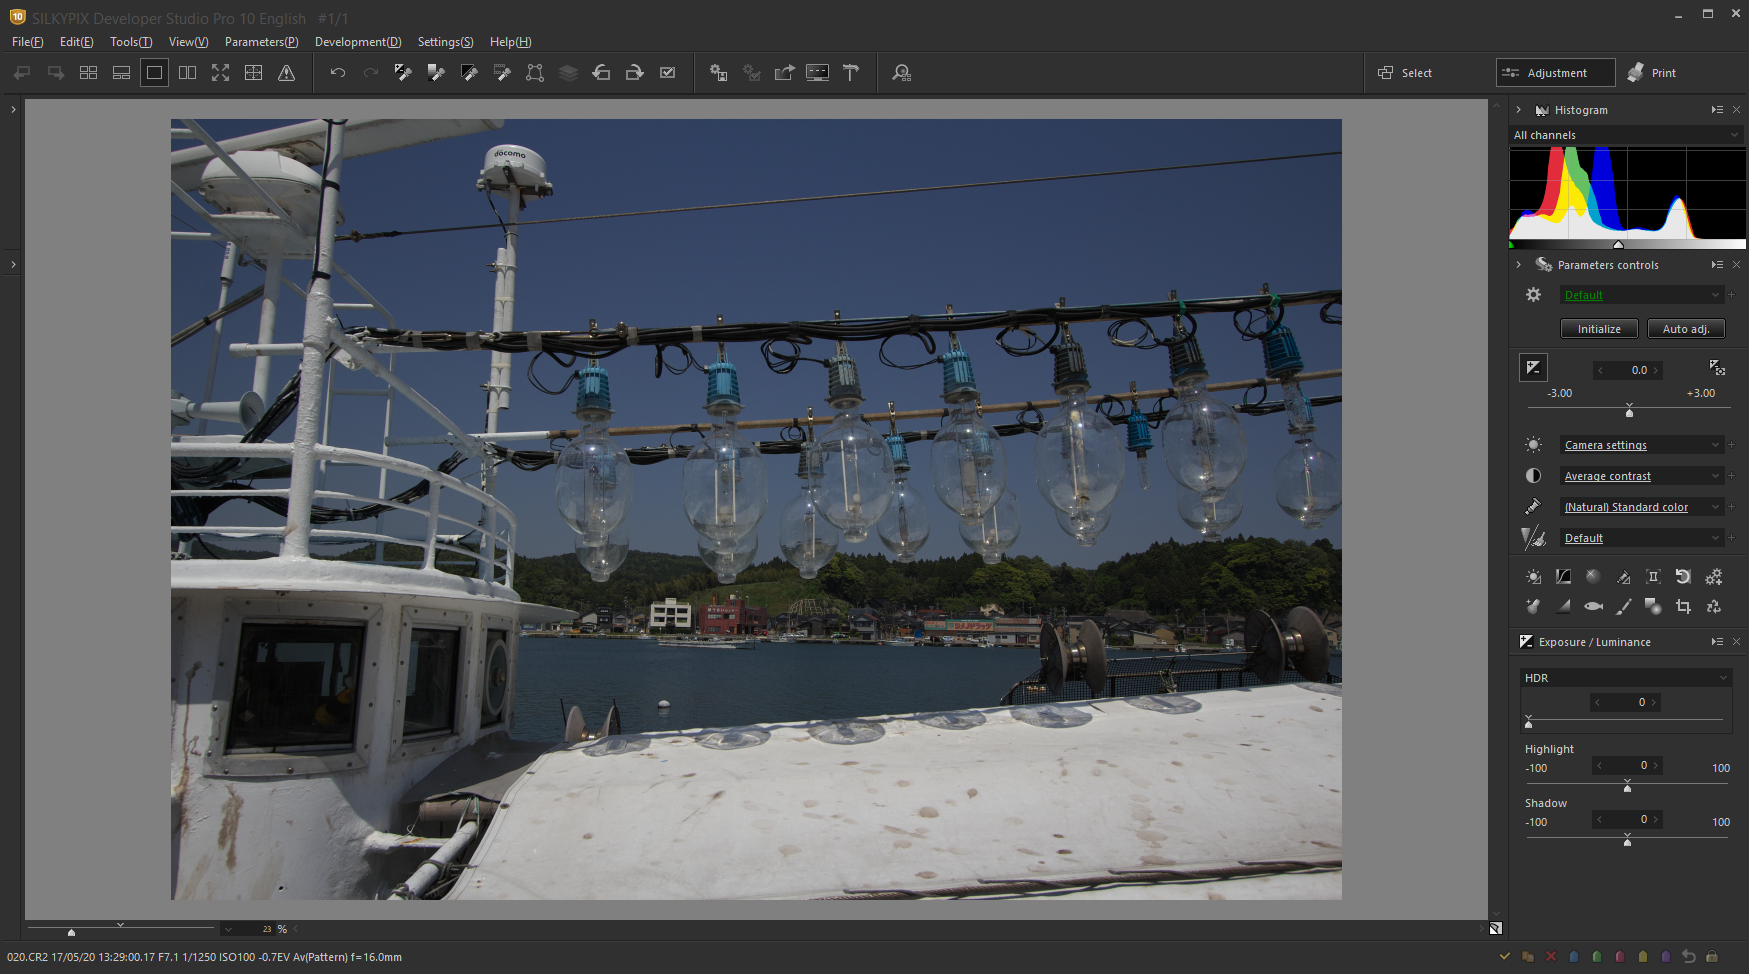
[1] First, let’s make basic adjustments!
Check the Exposure, White Balance, and Tone, and correct if necessary. I want to correct this image because the original image is dark and the horizontal is slightly tilted.
- Differences Between “Dodge / Color Burn” and “HDR”
- You can use “Rotation tool”, which makes it easy to straighten the horizontal.
[2] Using the Monochrome controller to finish the monochrome image
Let’s check how to use the “Monochrome controller” that enables monochrome adjustment and try it out.
- Fine-tuning after Monochrome controller adjustment
[1] First, let’s make basic adjustments!
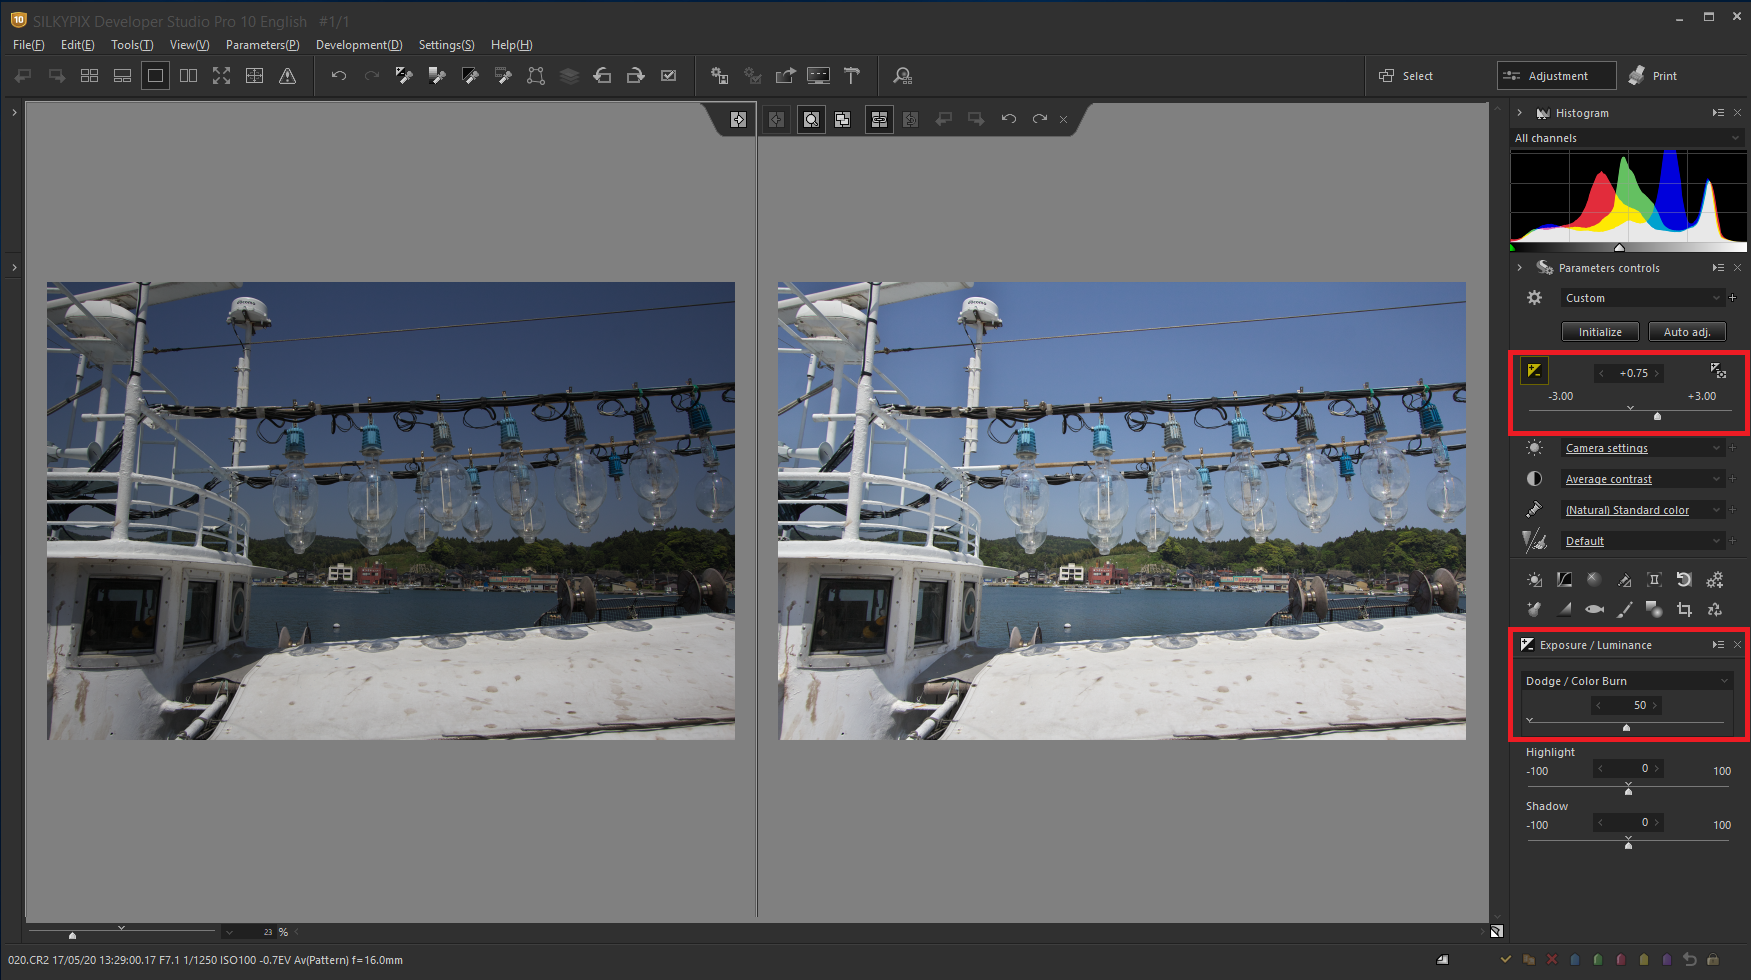
I correct the Exposure. “Dodge / Color Burn” has the effect of making bright places dark and dark places lighter. This feature is effective for images with large differences in lightness and darkness.
In this image, if you have corrected by Exposure Bias, the hull becomes blown out highlights. So, you can select “Dodge / Color Burn”, the sky are lightened. However, the hull does’t became blown out highlights.
Point: Differences Between “Dodge / Color Burn” and “HDR”
“Dodge / Color Burn” can achieve a natural dynamic range that is close to human vision. “HDR” can achieve a high dynamic range beyond human vision, which can be created an unrealistic world. If you apply too strong, the boundary between the dark and light areas will look unnatural.
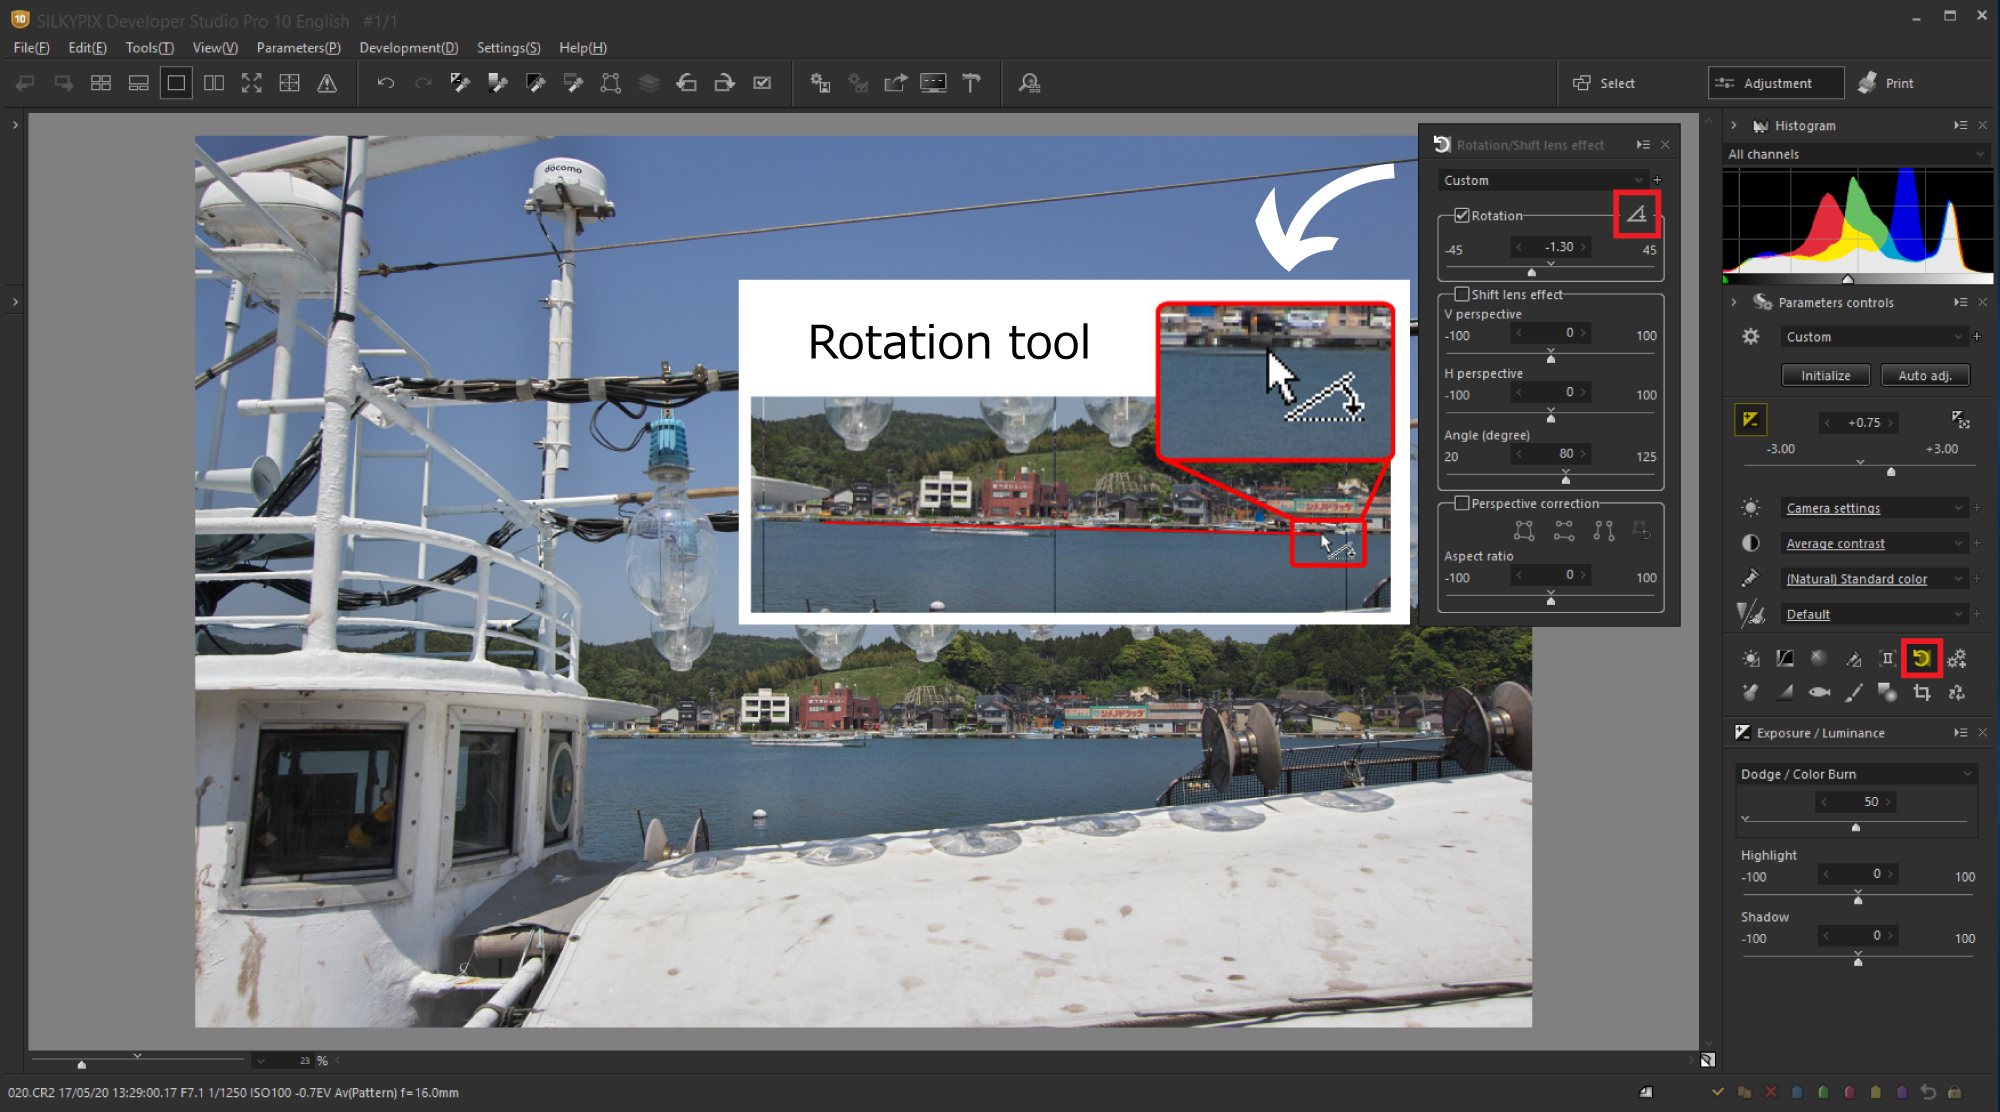
The inclination is conspicuous in images showing horizontal and vertical objects. Especially in the case of hand-held shooting, you can not take it straight unless you take it carefully horizontally and vertically. Even if you take such a photograph, SILKYPIX has a handy feature that makes it very easy to correct it.
Click “Rotation tool” of “Rotation / Shift lens effect” to make the cursor a dedicated icon. Then, please trace the horizontal line or vertical line by mouse dragging. The rotation angle is set automatically so as to correct the horizontal line or vertical line horizontally or vertically respectively.
[2] Using the Monochrome controller to finish the monochrome image
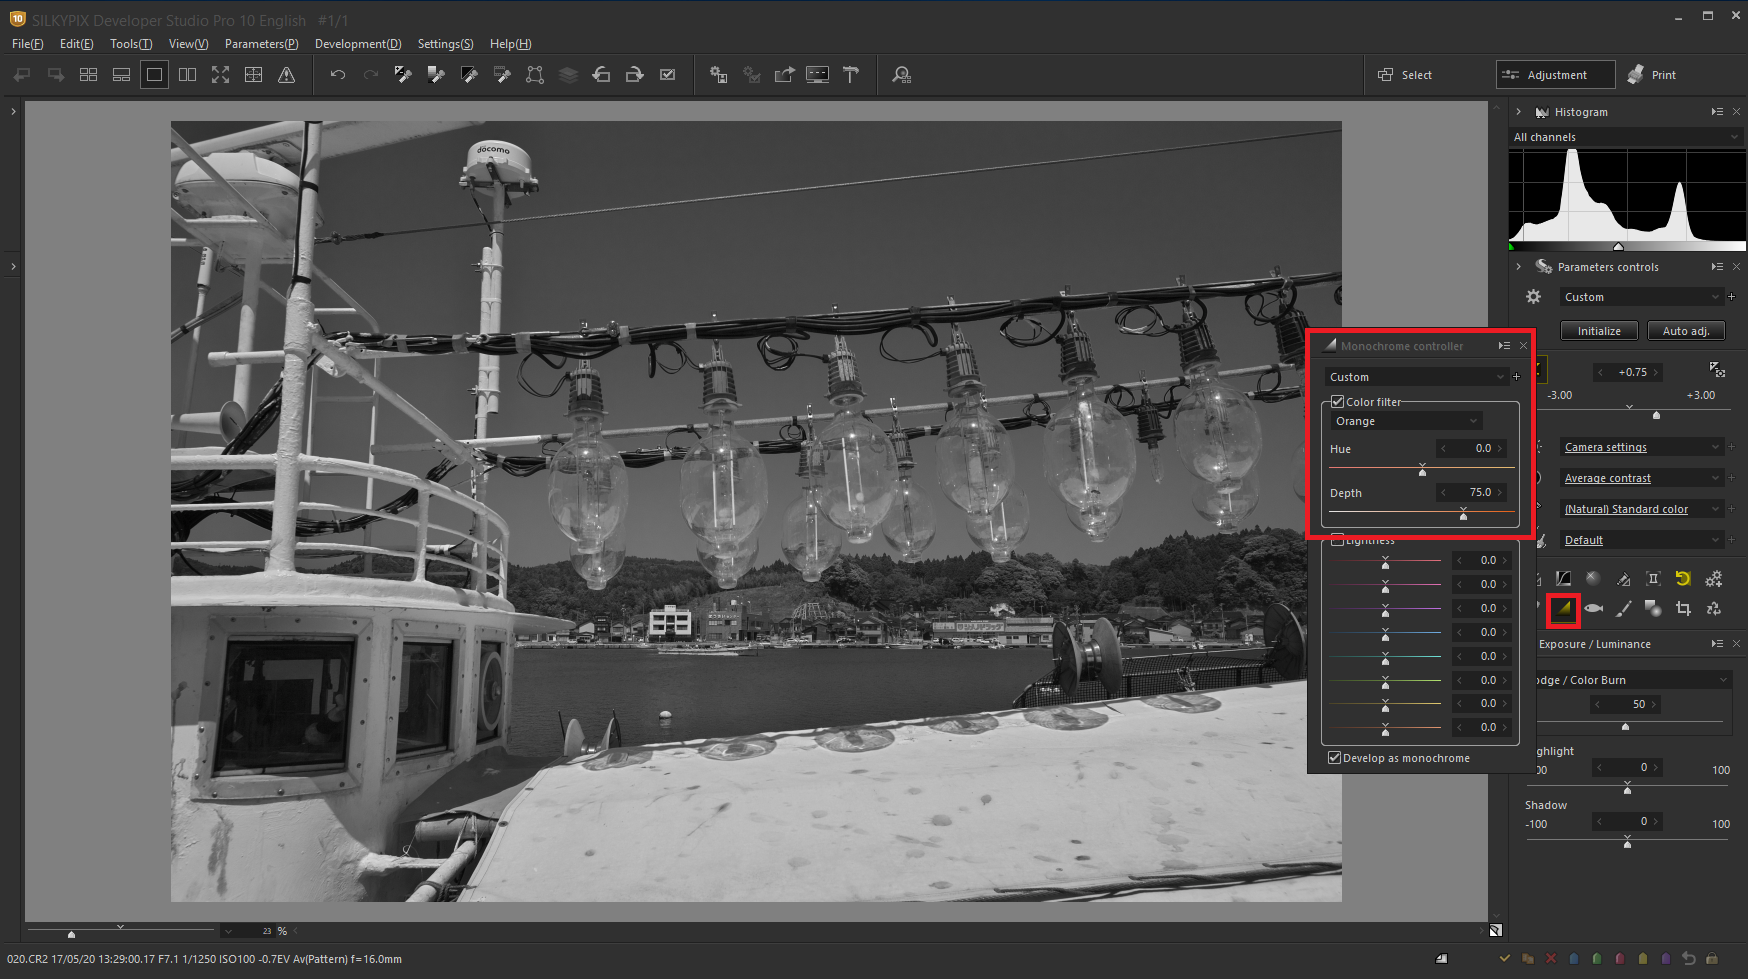
First, select the color filter to see the difference in the tone of the whole image. I selected an orange filter. The sky becomes darker, so the hull area stands out. You can choose your favorite color filter.
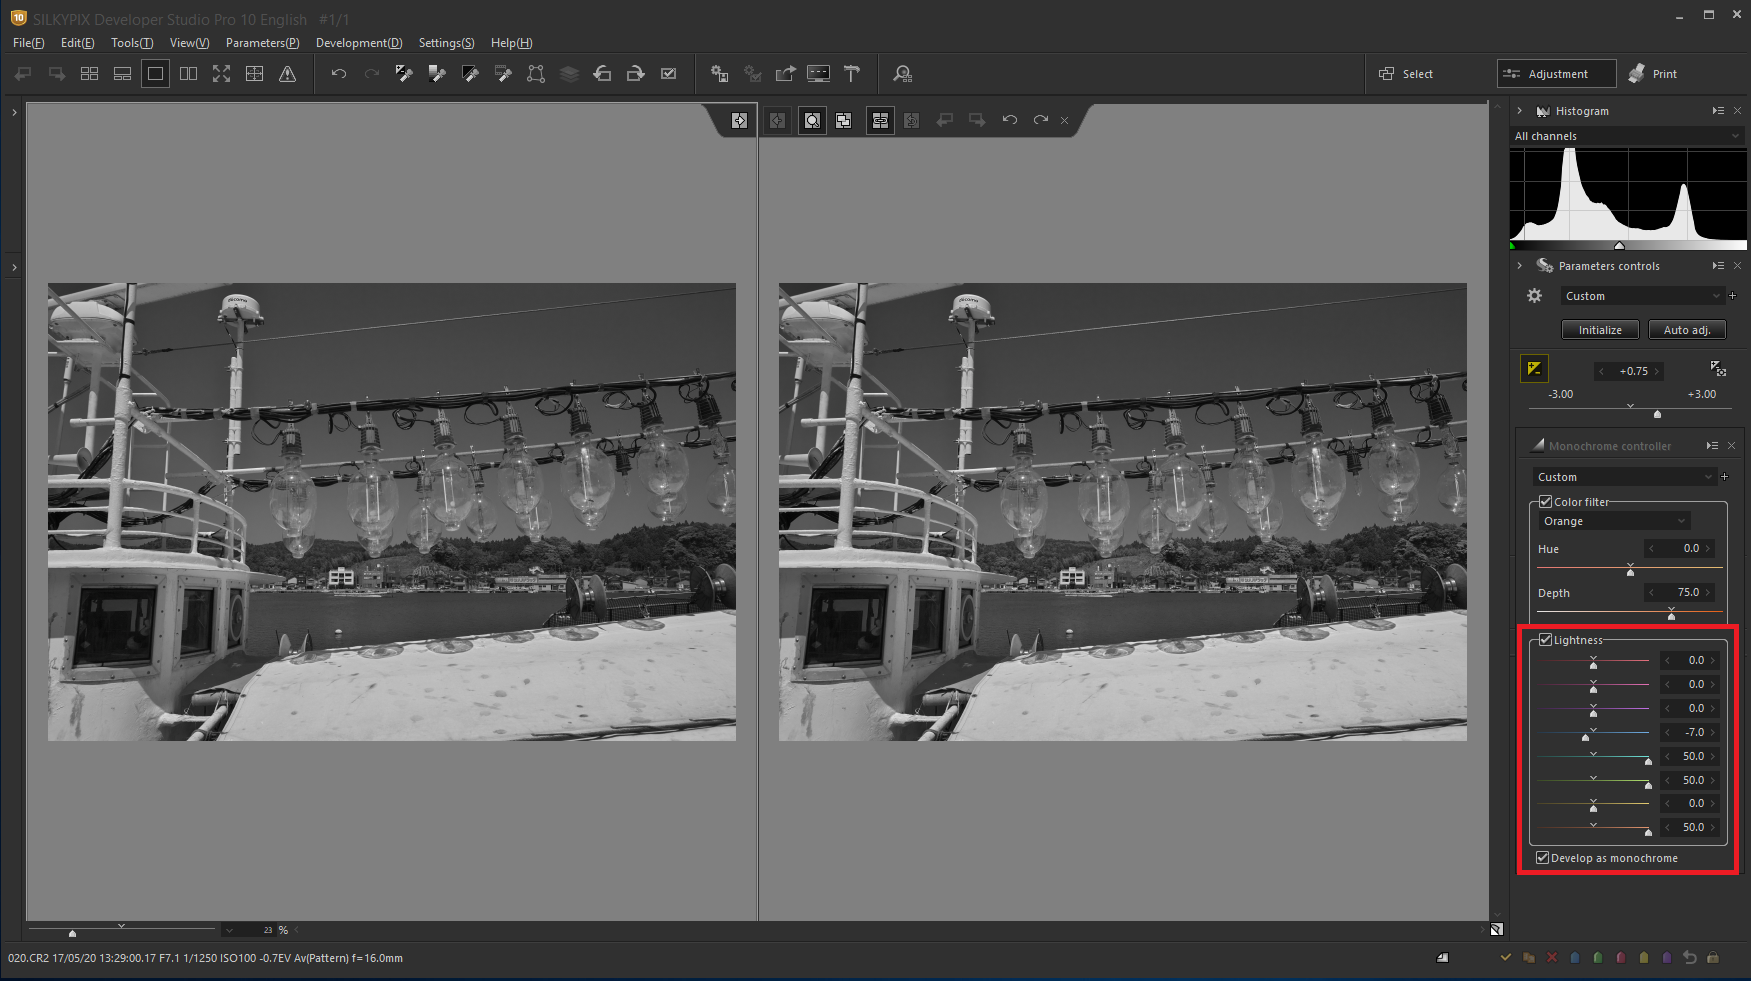
Use this Lightness adjustment to further refine the tone of the image created using the orange color filter. This image lightens the forest green and darkens the blue sky slightly.
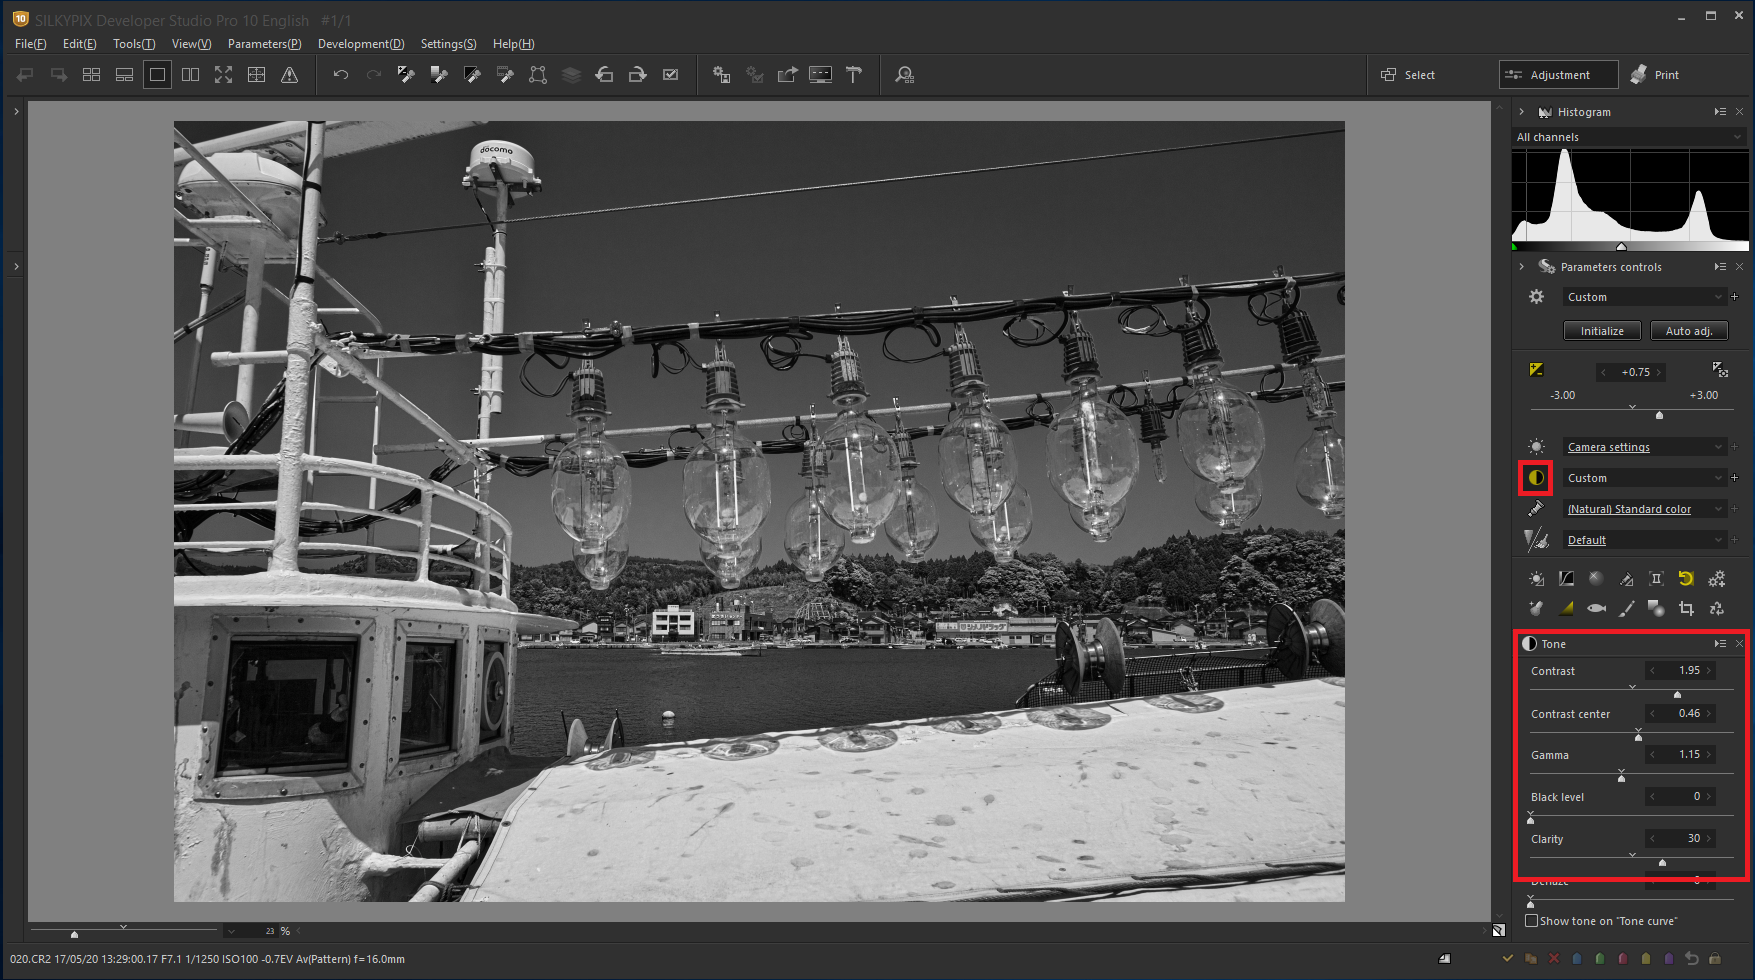
Point: Fine-tuning after Monochrome controller adjustment
Now that you have a monochrome image, you can finally adjust the overall tone.
When increasing the contrast, the bright area becomes brighter and the dark area becomes darker, i.e. high contrast. The high contrast, the image becomes the hard tone.
Clarity adjusts the fine texture of the subject. If you increase clarity, you can refine the details of the subject more clearly, so if you want to revive the texture of a sleepy landscape photograph as a whole, this will have that effect. You can also reduce the clarity of flowers and portrait imaes to create a soft-focus image with a soft-tone.
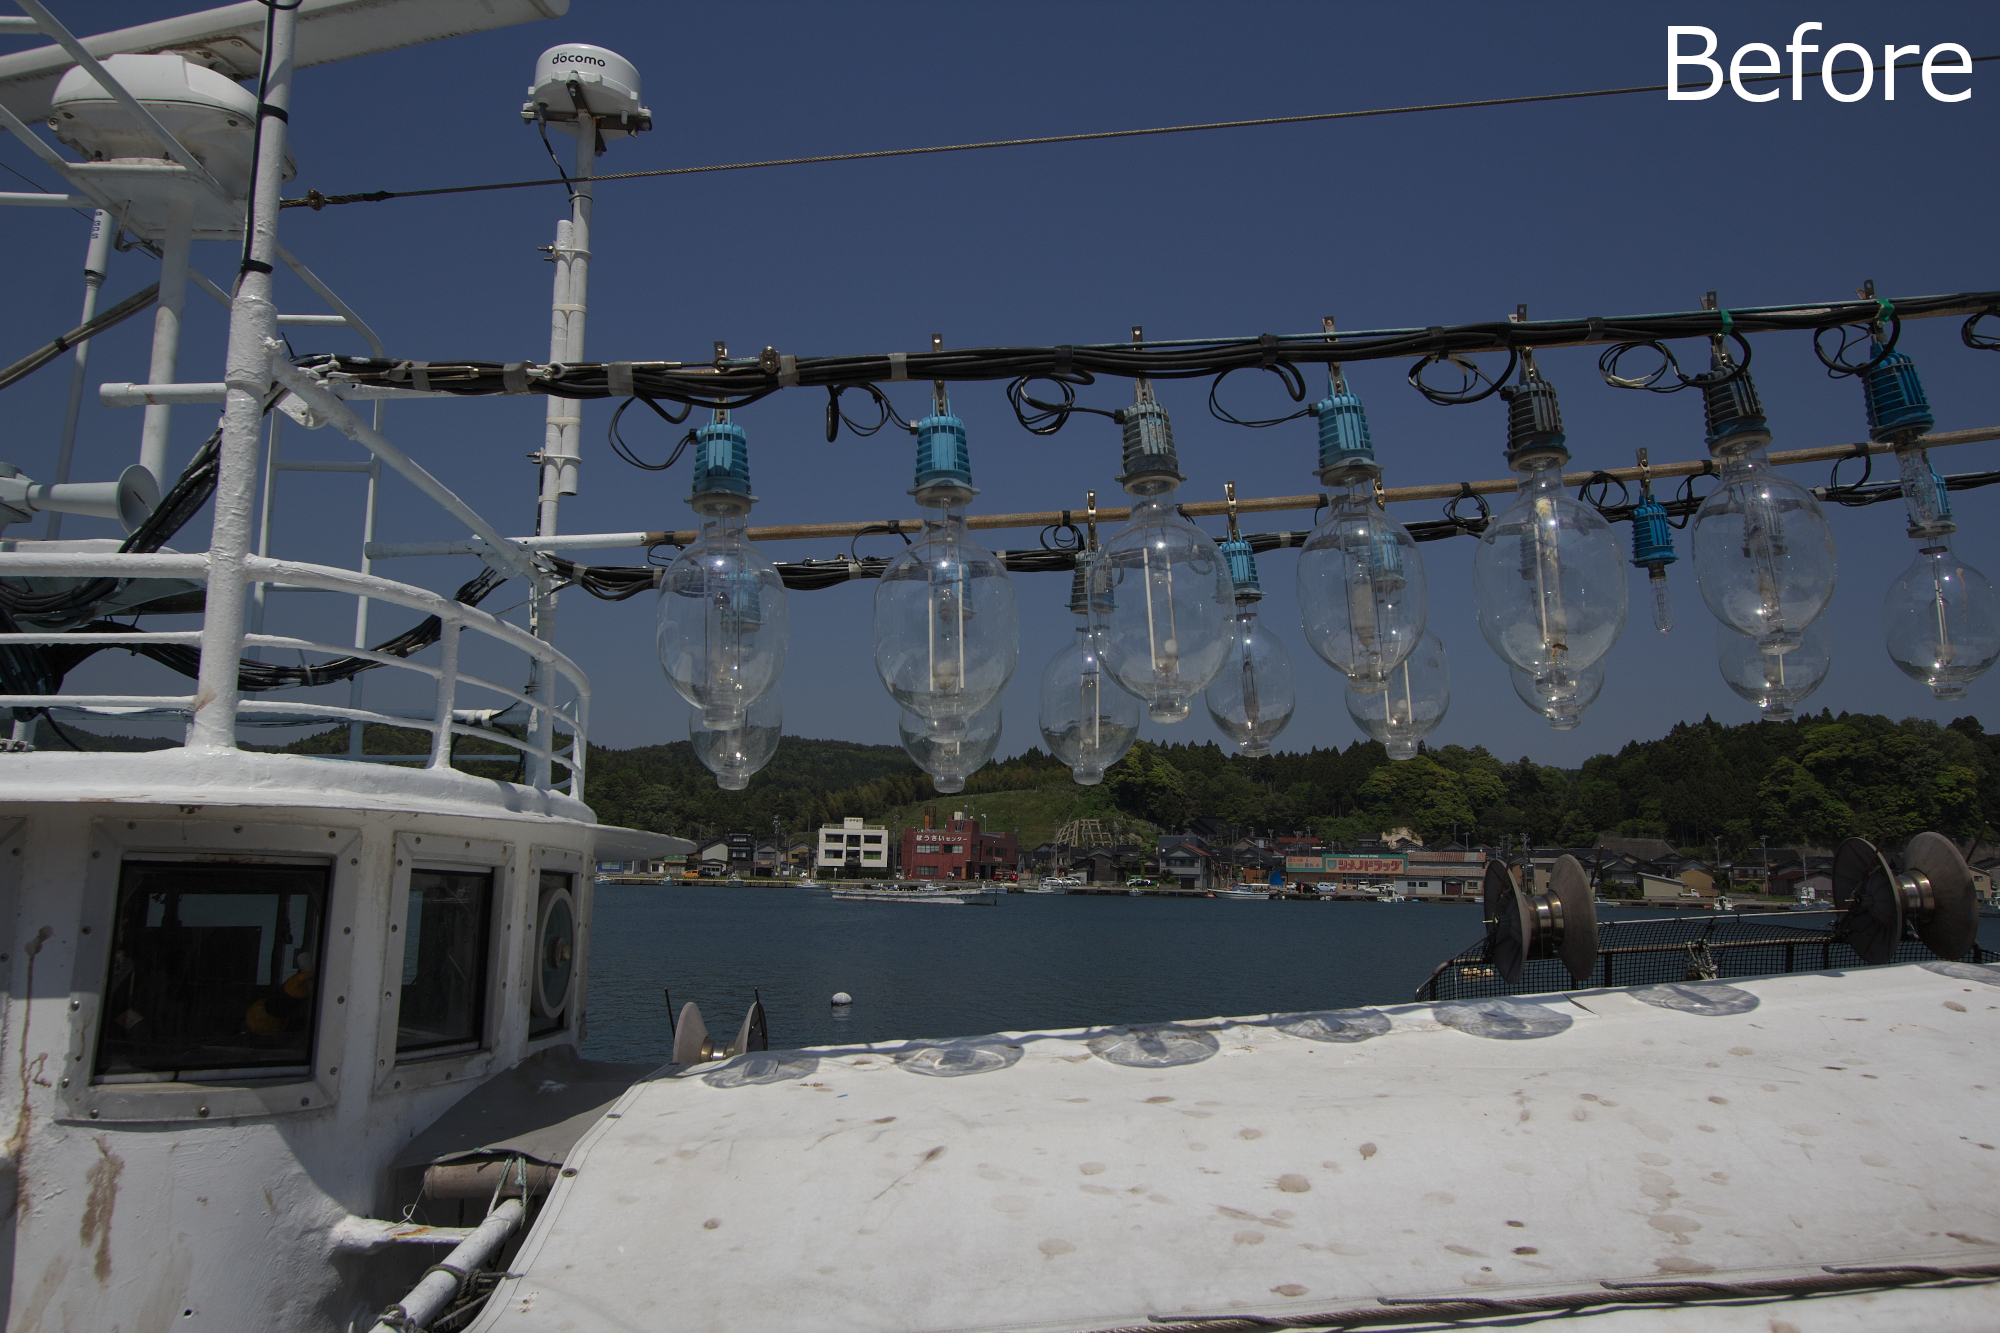
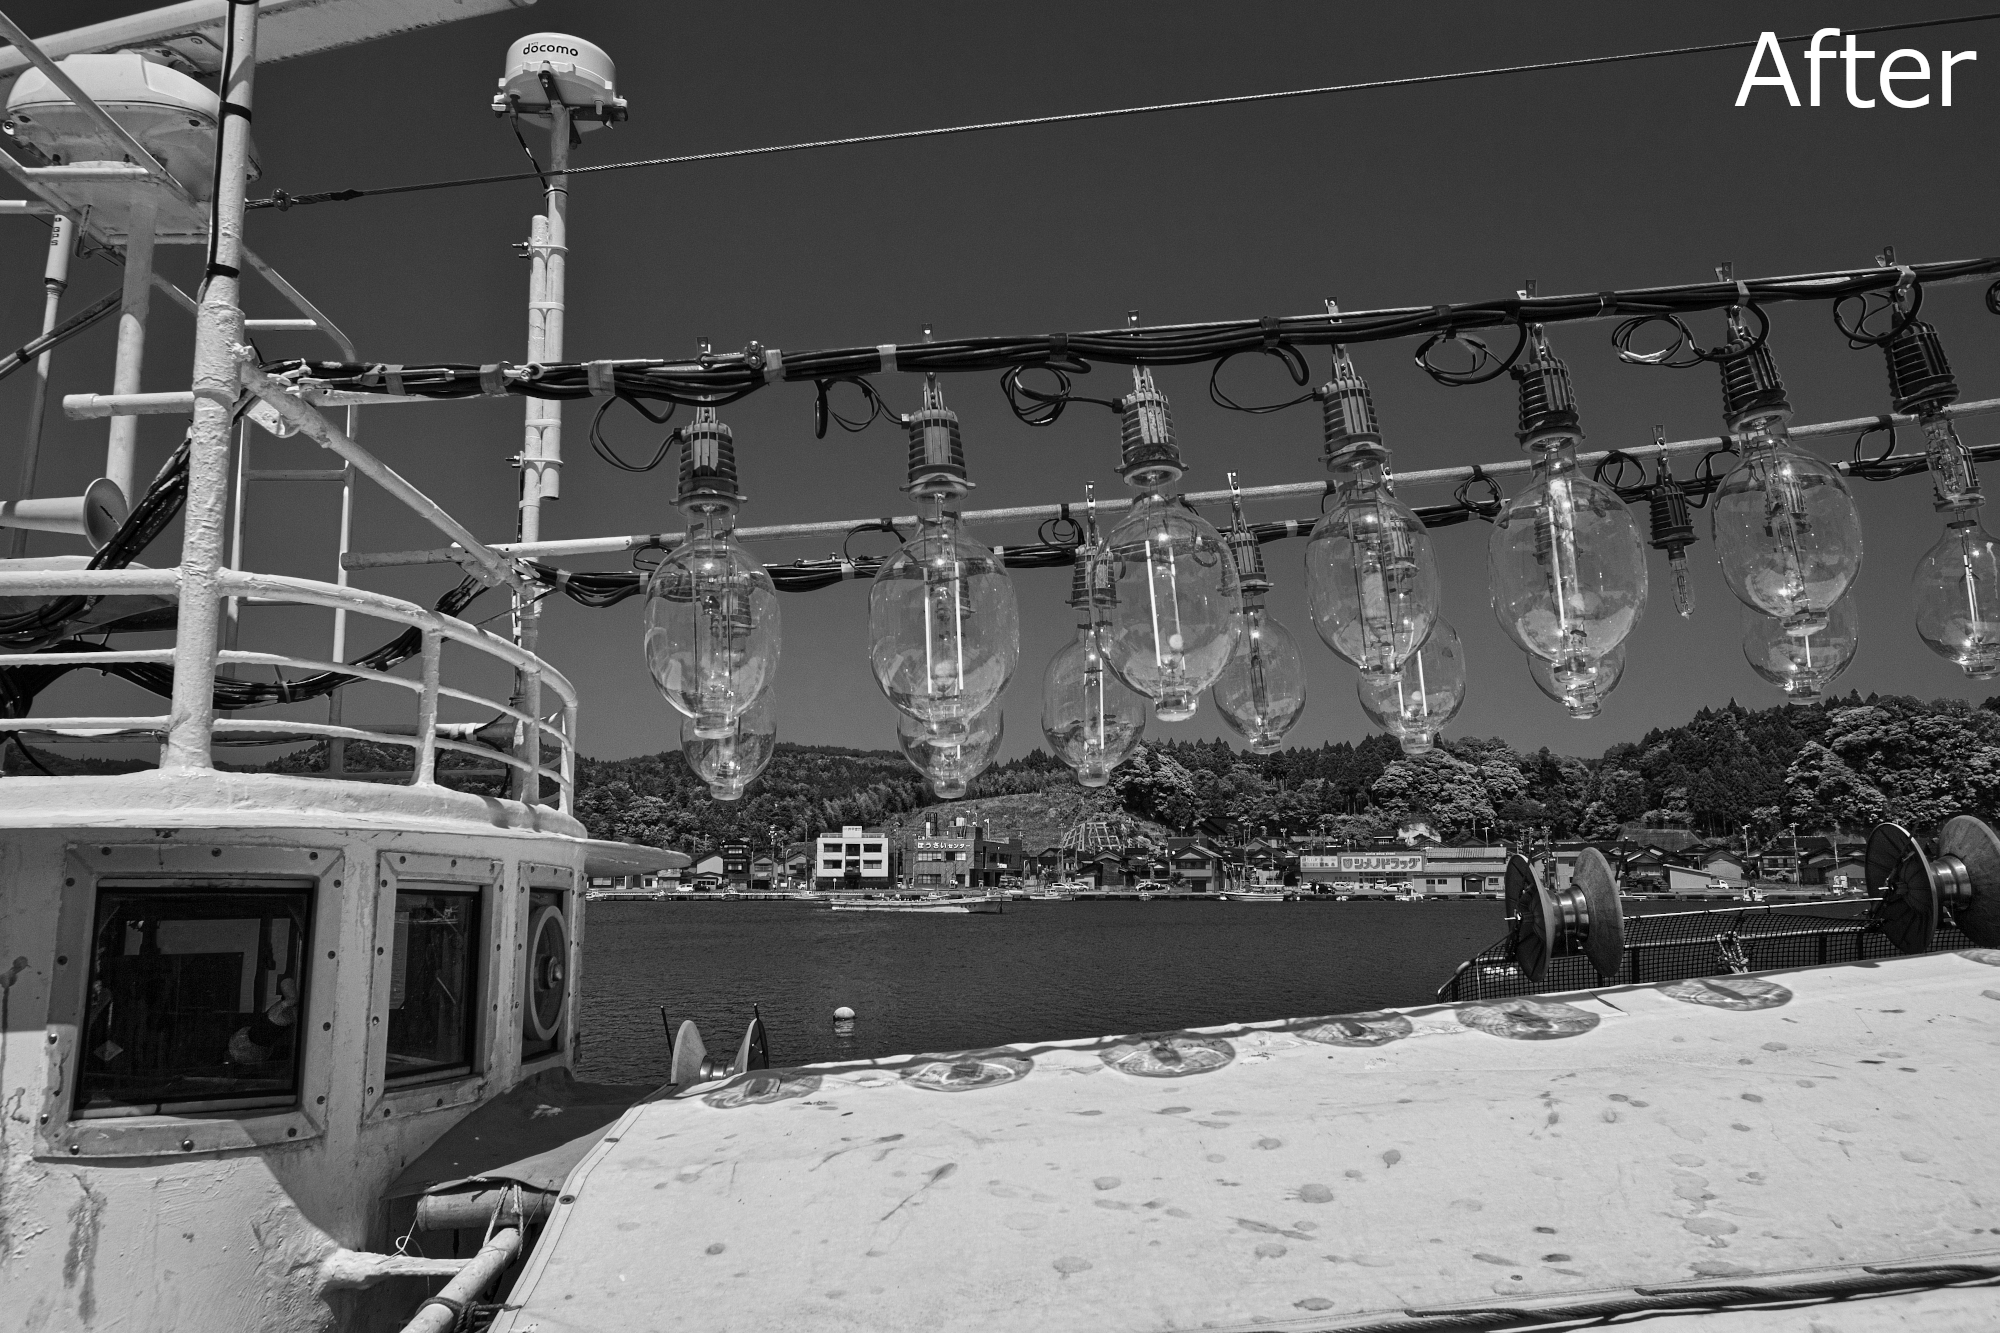
This Monochrome controller makes it easy to make adjustments such as lightening or darkening the color, making it possible to create monochrome images with many different moods of the same subject.
Monochrome images make the subject more impressive. If you want to make monochrome images from color image, we hope you use the Monochrome controller in SILKYPIX!
 Go Back

