Apr 10, 2020
"Linear" of the Blurred / Sharp periphery
Introduce “Linear” of the Blurred / Sharp periphery
About “Linear” of the Blurred / Sharp periphery

First, we introduce the Blurred / Sharp periphery, which is implemented from the Pro9. The Blurred / Sharp periphery function allows you to blur or sharpen the image gradually from the center to the periphery.
The Blurred periphery
For example, a wide-angle lens may be used, or focusing may be too bright to open. Then the background is not so greatly blurred. Therefore, by using the “Blurred periphery” function, you can control the blur around the specified location of the image. You can use the Blurred periphery function to control the blur around a specified point in the image.
The Sharp periphery
When shooting with the focusing open or using an super-wide angle lens, the resolution and contrast around the image may decrease depending on the lens. When focusing is opened, the resolving power at the center of the lens increases. As a result, the difference in resolution between the center and the periphery increases, and the periphery may appear blurry. You can adjusted this case with the Sharp periphery.
For more details on the function introduction “The Blurred / Sharp periphery”.
In the Pro9, the Blurred / Sharp periphery type was only “Circular” but “Linear” was added in the latest Pro10. By using the “Linear” of the Blurred / Sharp periphery, you can add stepwise blurring in the up-down, left-right, or diagonal directions of the image!
To use the “Linear” of the Blurred / Sharp periphery
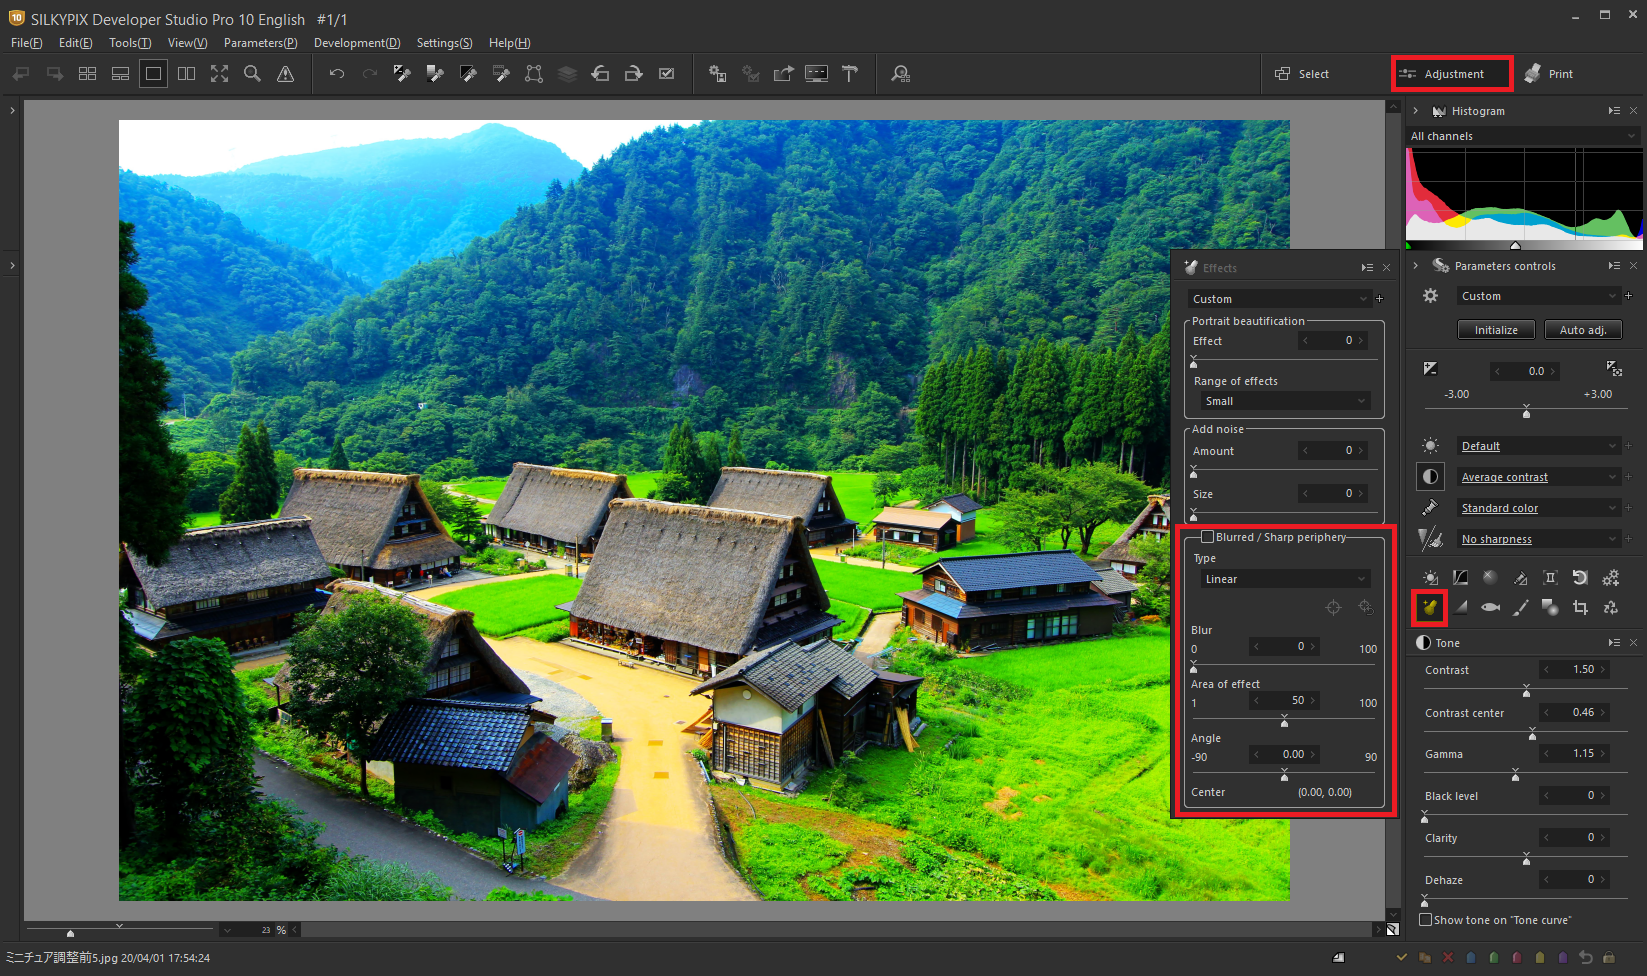
Make sure that the section of the main window is the “Adjustment” section. Click here for Main window section switching.
Click the sub-control icon “Effects” to display the control box, which contains the Blurred / Sharp periphery. Click the check box and select the “Linear” type. Specify the center on the display with the Blurred / Sharp periphery center tool, and the amount of blur with the Blur slider to apply the blur.

*In Circular, moving the slider to the left has a blurring effect, and moving the slider to the right has a sharpen effect that is progressively stronger. In Linear, the blur effect gradually becomes stronger when the slider is moved to the right. Sharpen is not possible.
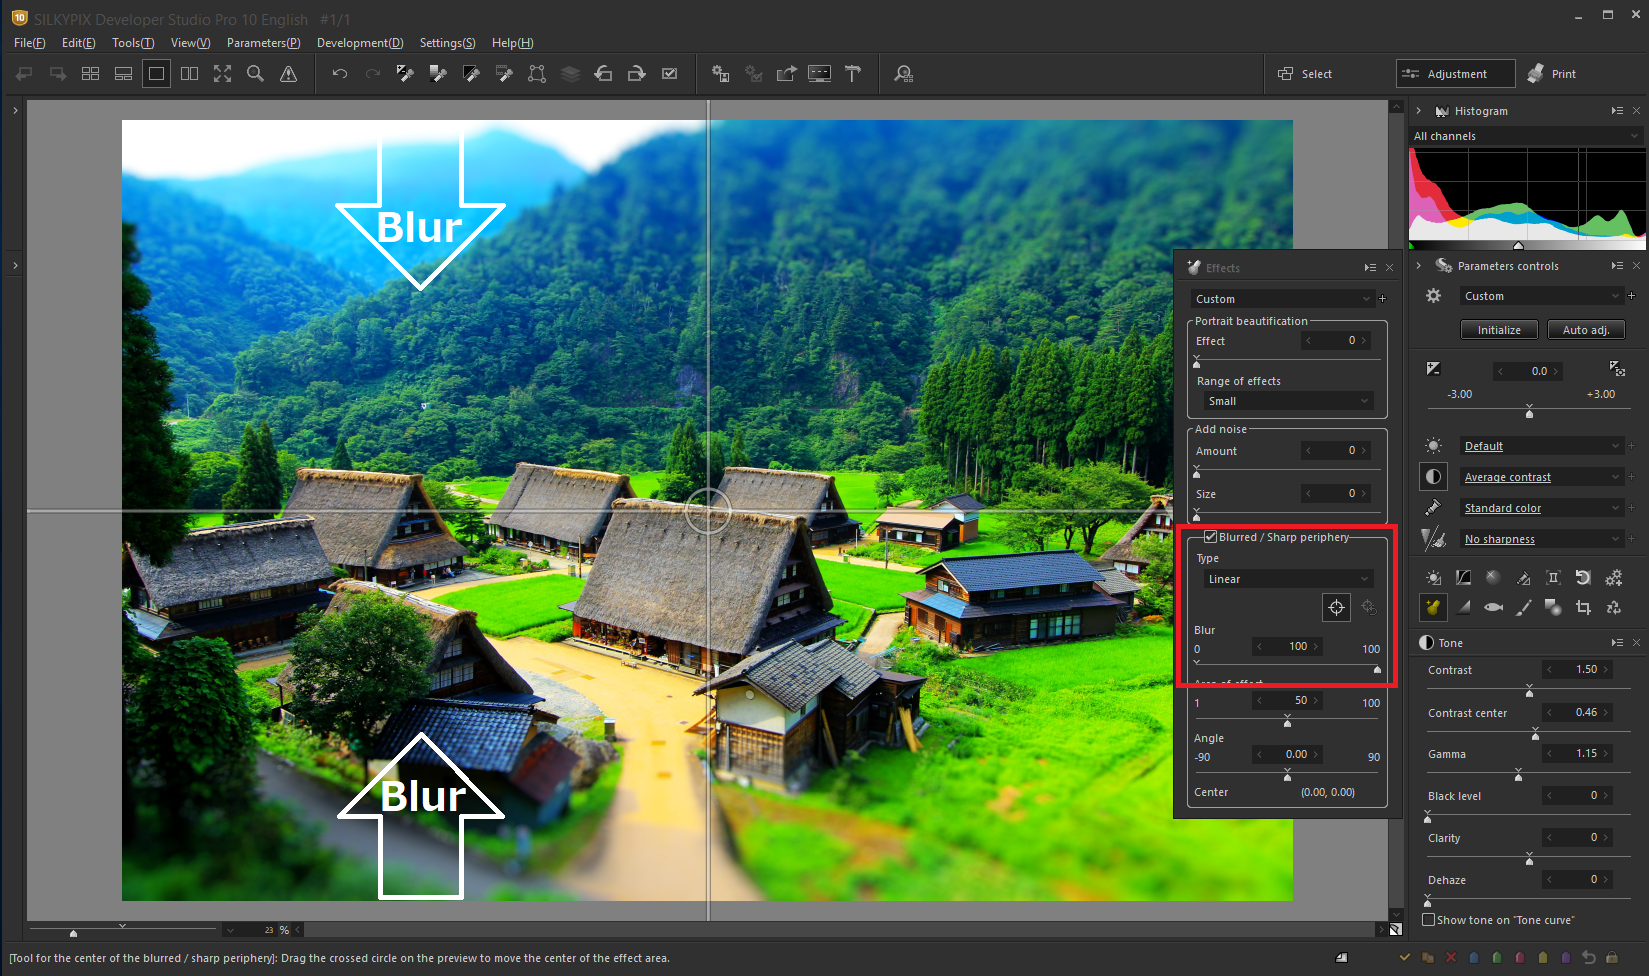
As a trial, if you set the “blur” to 100, you will see that the blur is strongly applying from both the top and bottom. The effect range and angle can be adjusted, so please use them according to the image.


Example using the “Linear” of the Blurred / Sharp periphery

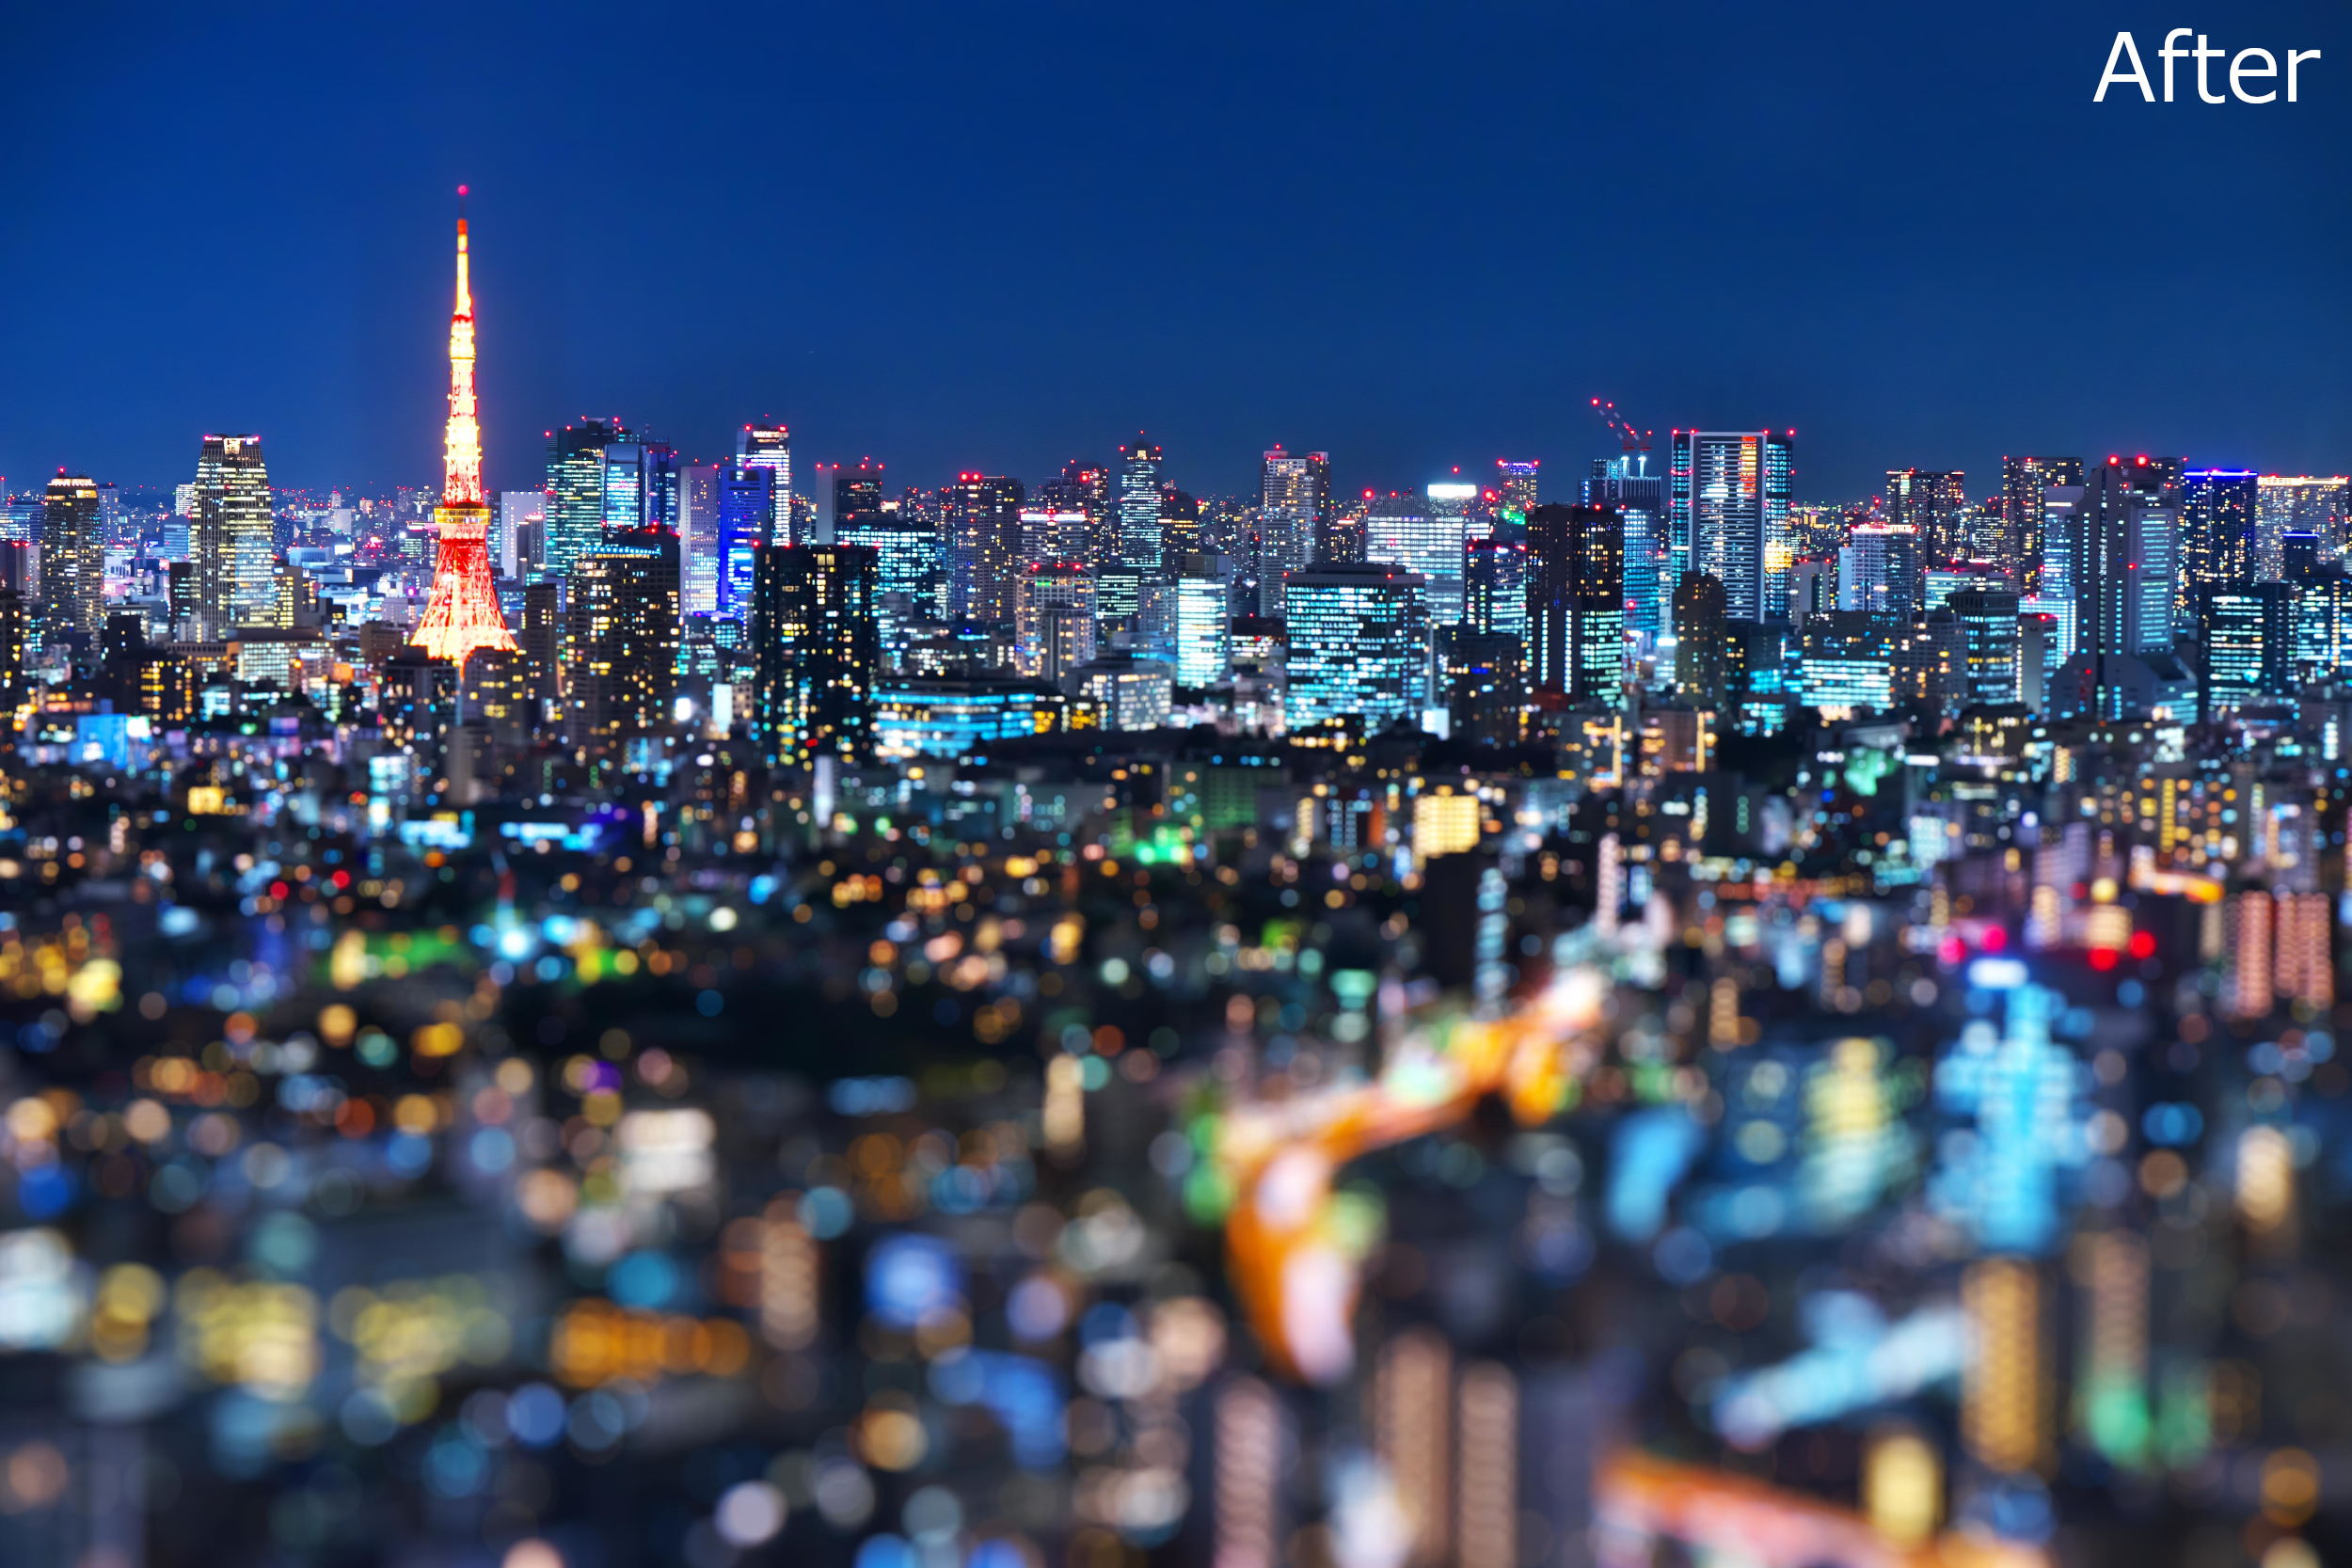
When I lifted the center thoroughly and blurred only the bottom side of the image widely, I was able to blur the city light in front of me as a beautiful blur. SILKYPIX are particular about the blur.
In addition to applying blur to both the top, bottom, and left, you can also apply blur to either the top, bottom, or right or left side, so please use it for your images!
Finish images like dioramas or miniature photographs
With the “linear” blur effect, you can easily create images like dioramas or miniature photos by making the perspective unnatural compared!
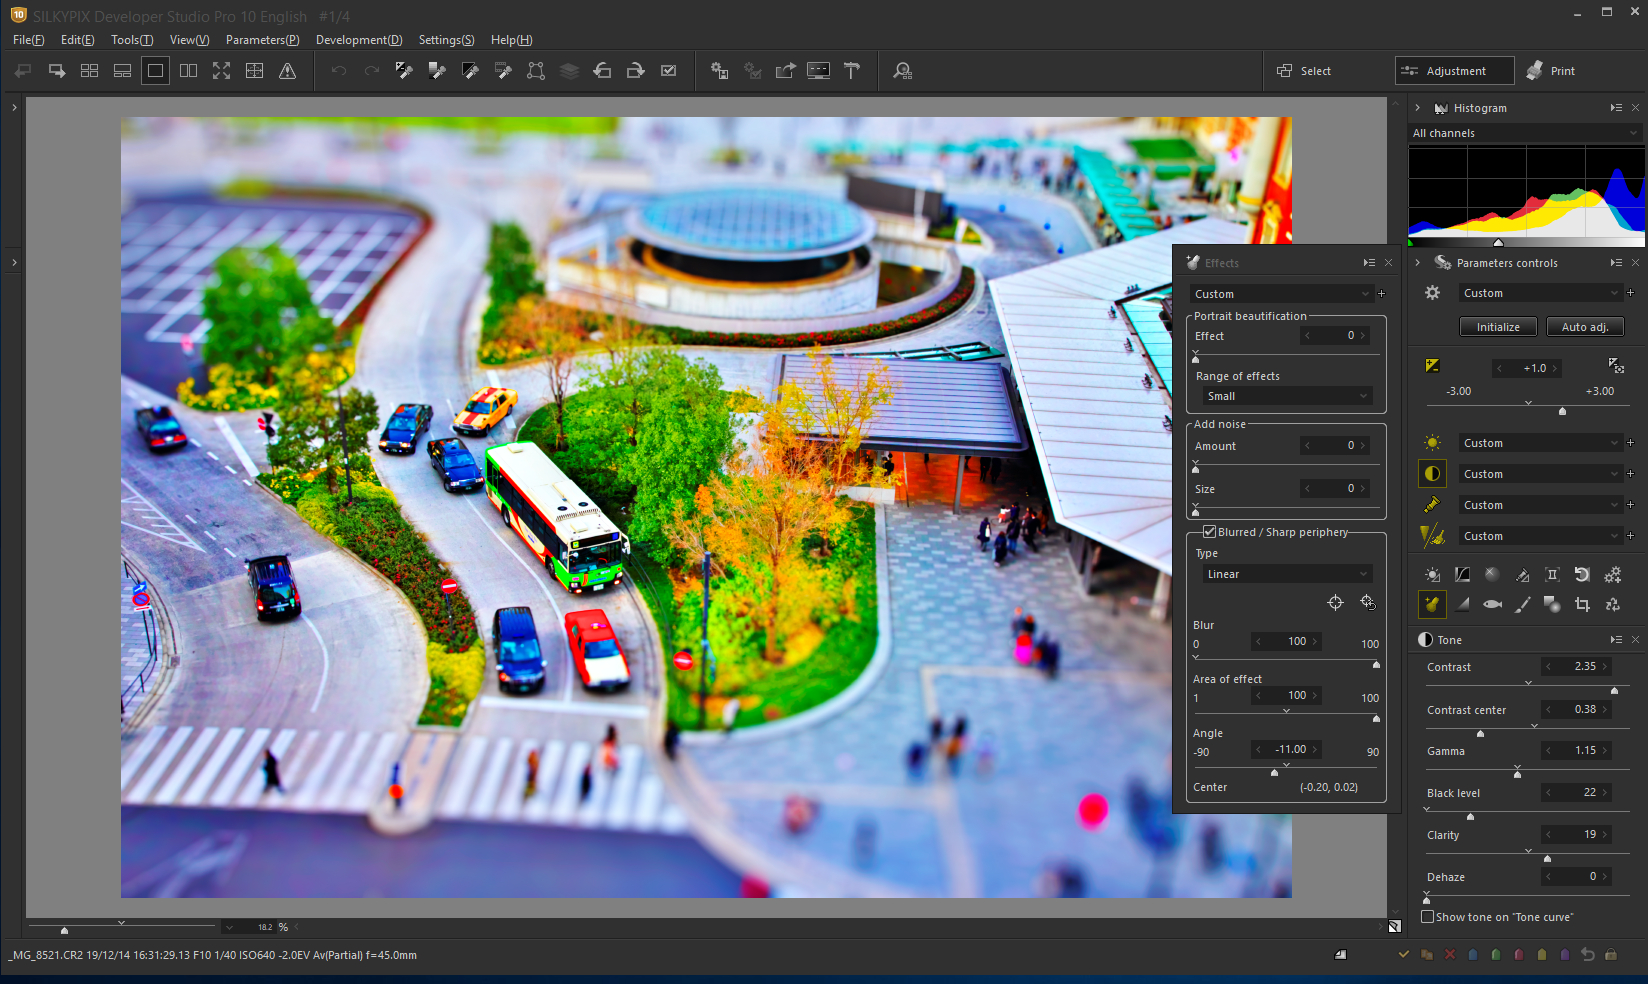
We adjusted the exposure, White Balance, tone, saturation, and so on, and finally applied a “linear” blur at an angle that matched the image. SILKYPIX is an easy-to-understand software that installed items you need to adjust, such as exposure, White Balance, tone, saturation, and so on, from the top to the bottom!
Then, by using the “linear” blur of the Blurred / Sharp periphery added to Pro10, you can easily finish the image into a tilt shift photographic style!
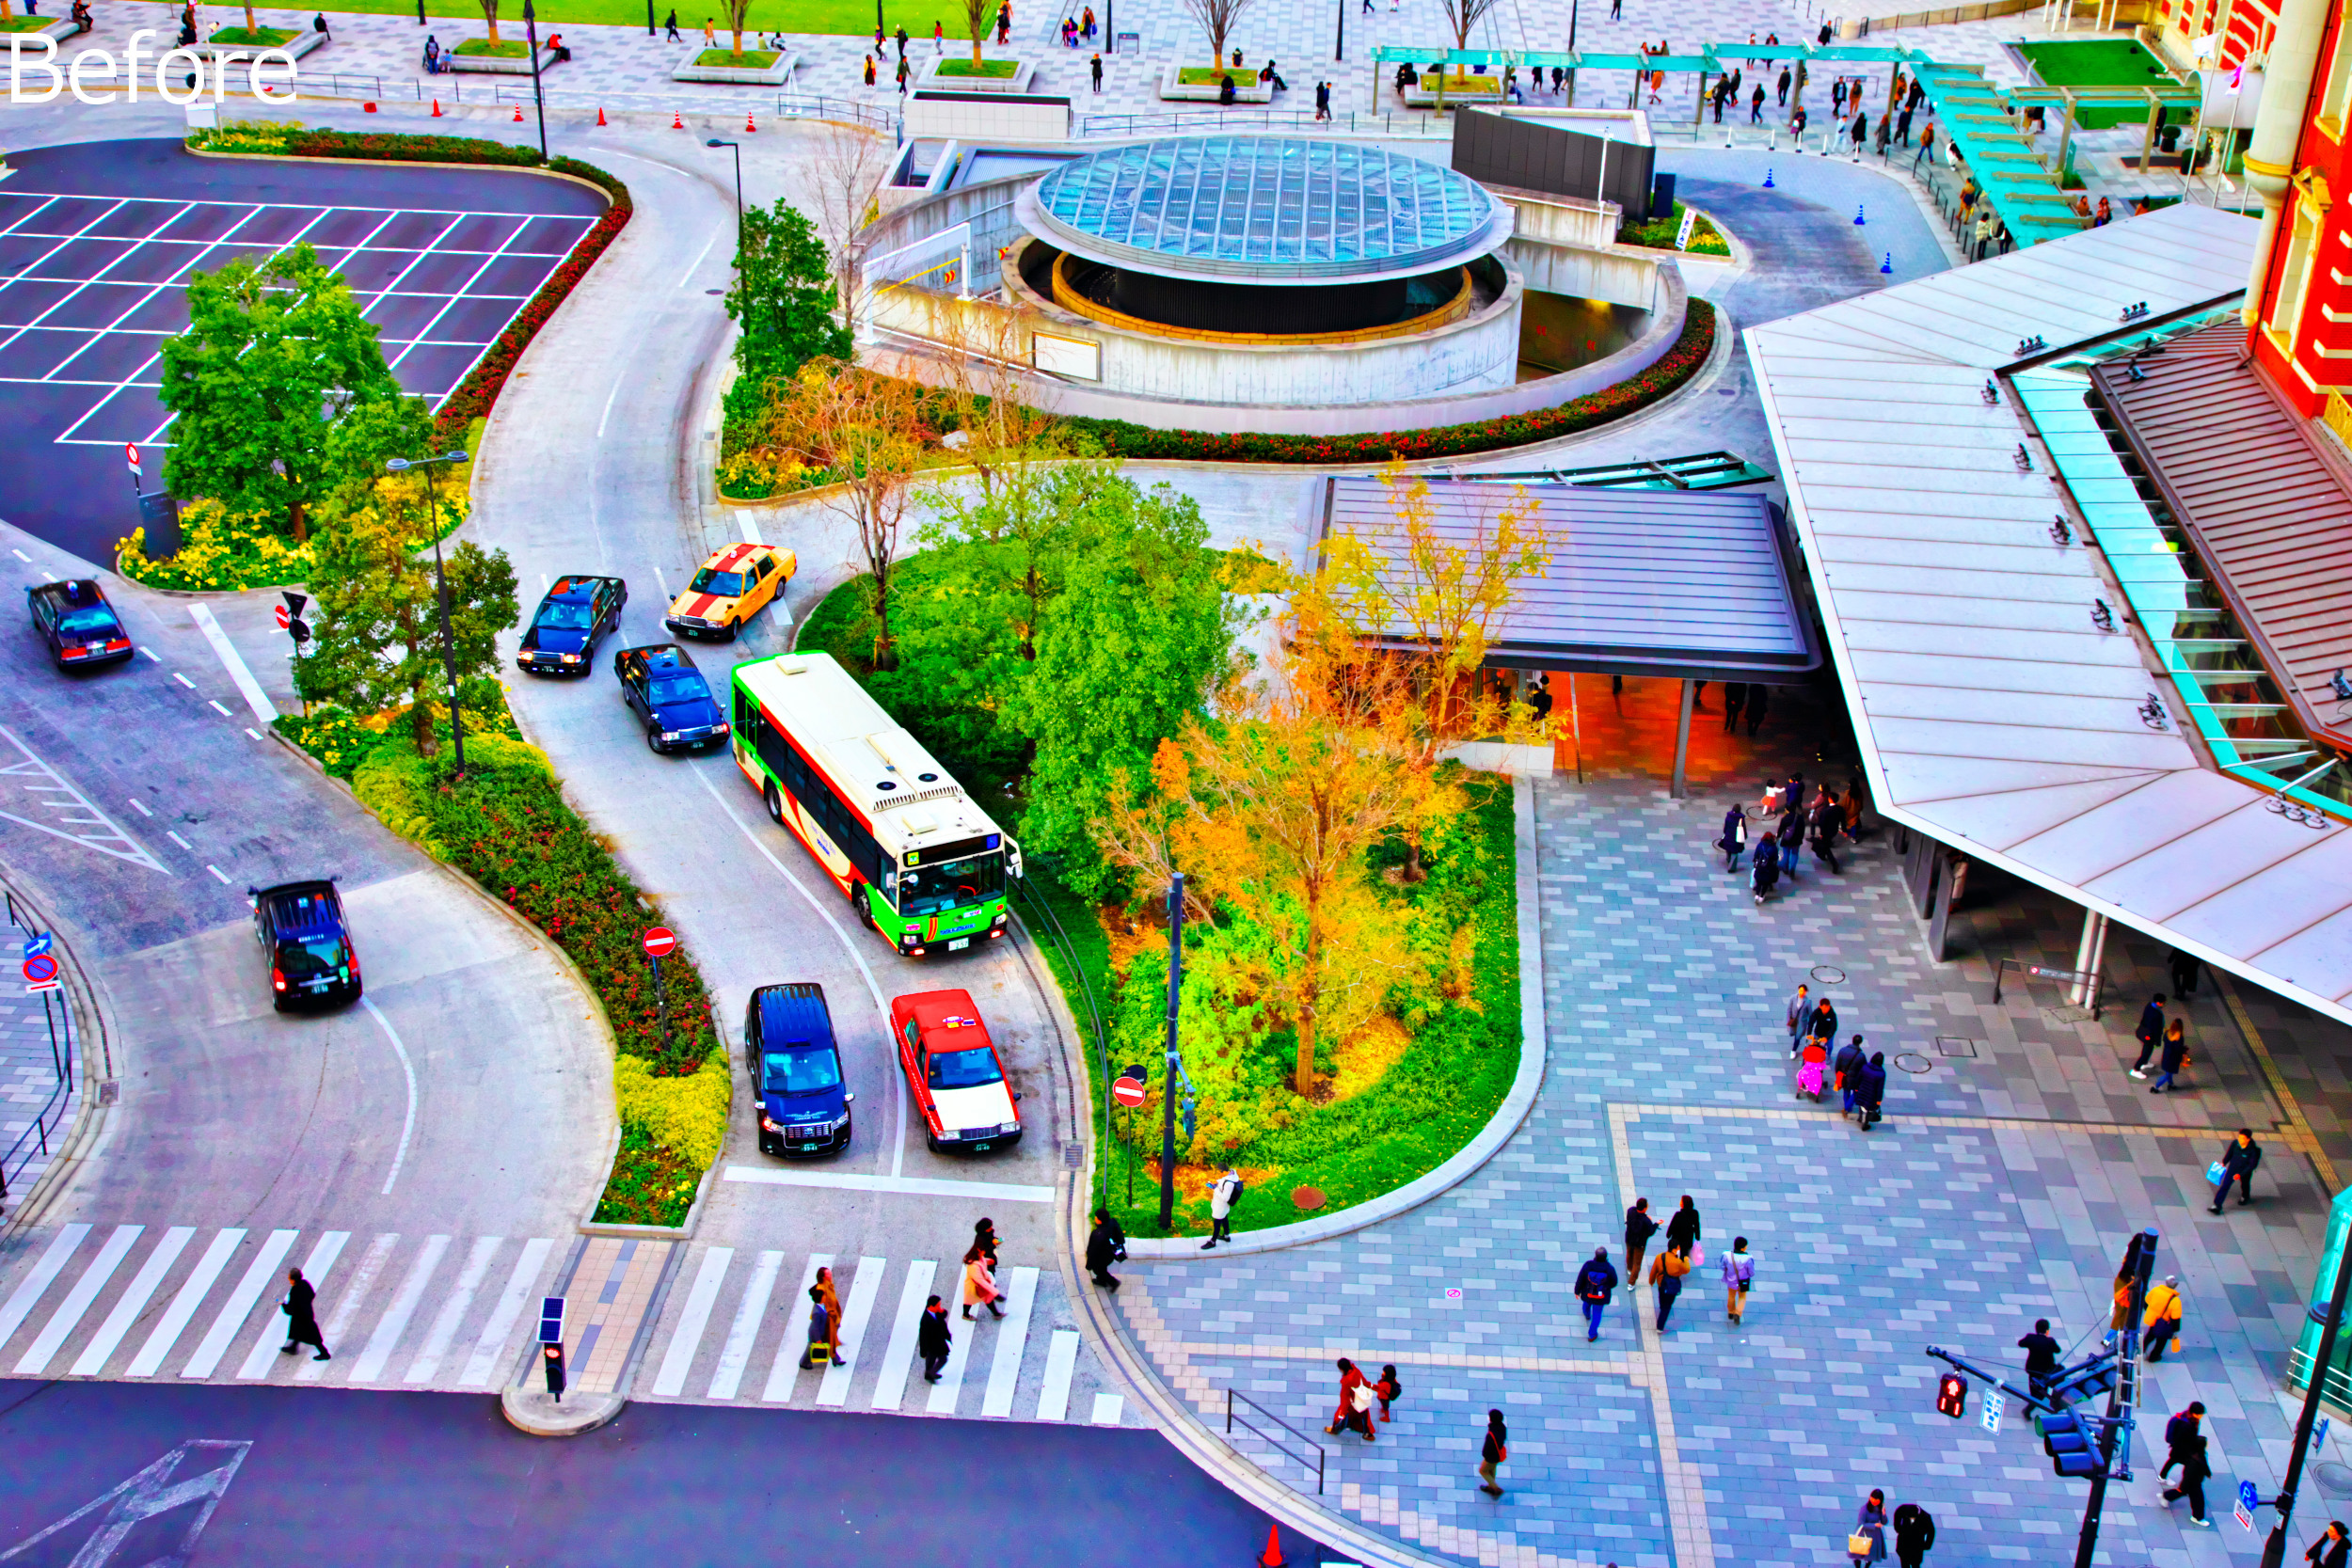
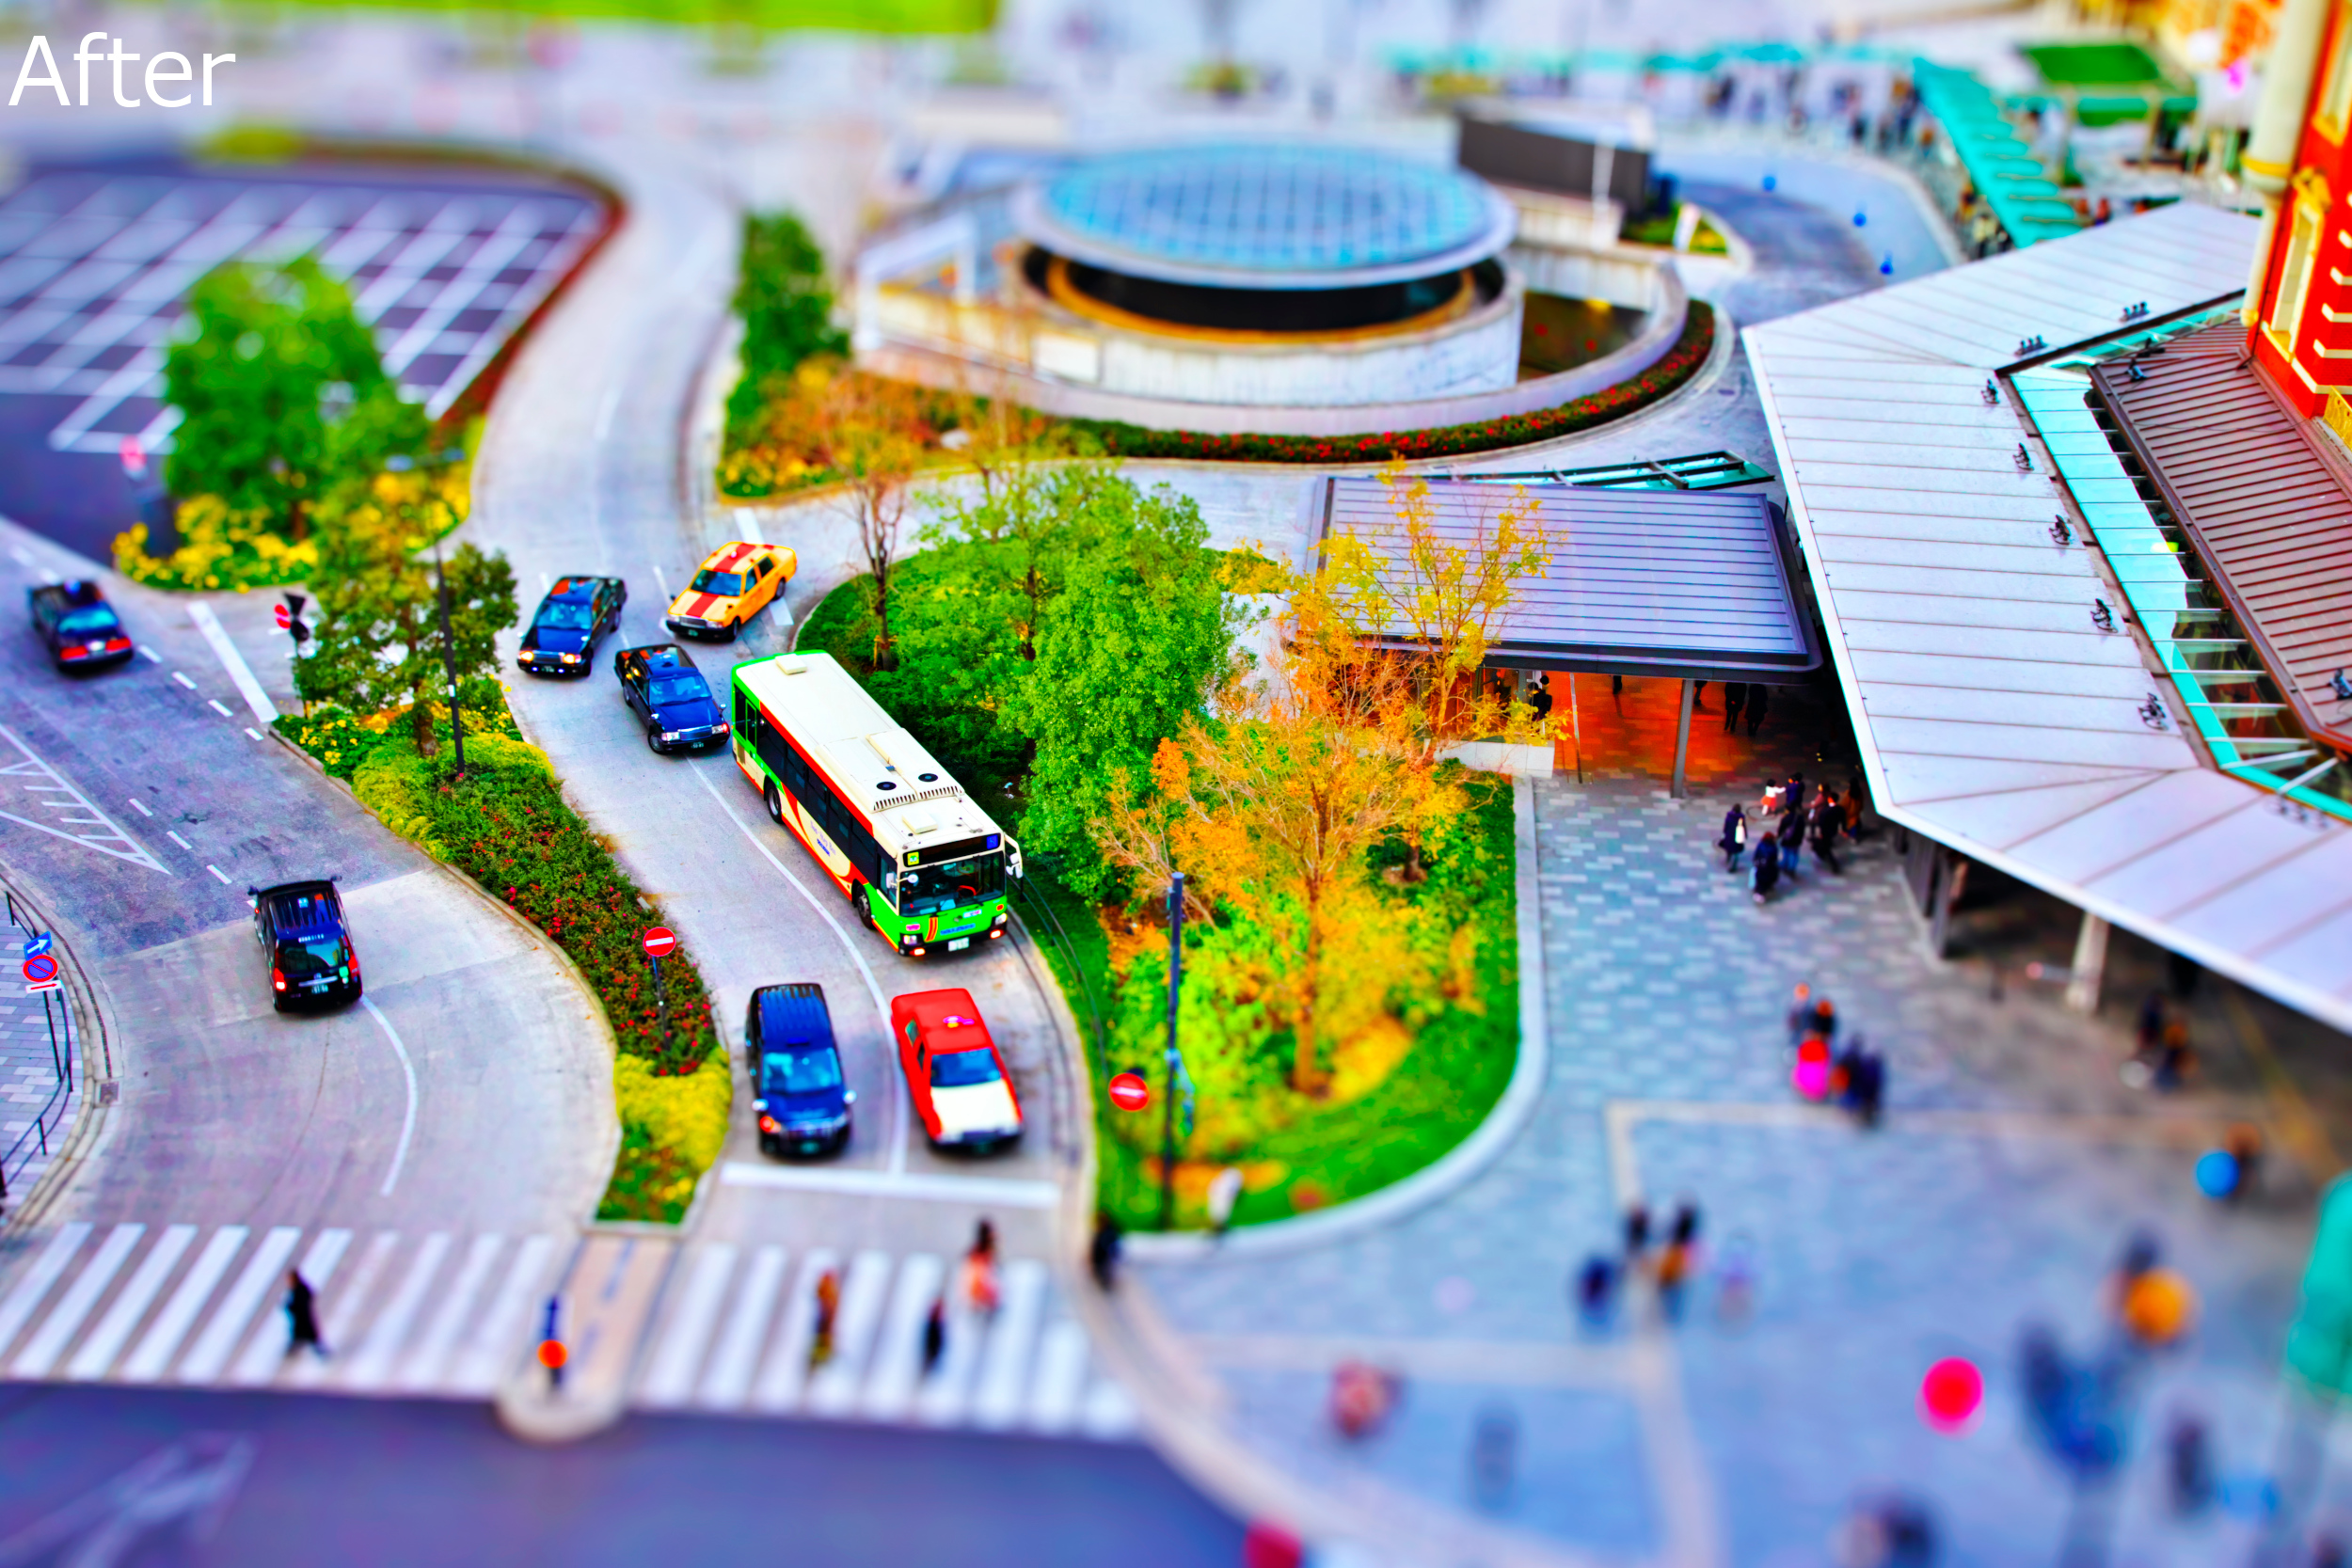
Please, also check the example of The Blurred / Sharp periphery on Pro10 function introduction pages. And please also try your images by all means.
 Go Back
