Jan 09, 2020
Automatic distortion correction using JPEG
In SILKYPIX Developer Studio Pro, the “Lens profile” function is used as a way of correction distortion. This is automatically corrects the distortion based on the information in the correction data of the lens. Click here for about the Lens profile.
This time, we will introduce another way of correction. It is Automatic distortion correction using JPEG. Auto distortion can be corrected for Raw data with a single click using JPEG images recorded at the same time.
What is the Automatic distortion correction using JPEG?

Maybe you were shooting in a mode such as “simultaneous recording” or “RAW + JPEG” that records both RAW and JPEG data at the time of shooting. Many people are the same.
This function calculates the distortion correction value using the JPEG image recorded when the photograph was taken.
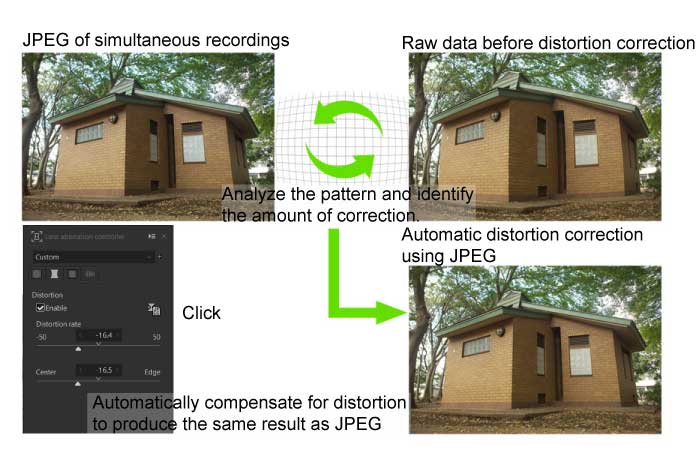
So, the Automatic distortion correction using JPEG analyzes patterns in the JPEG after lens-aberration correction has been applied in the camera. Compensates for automatic distortion by comparing it with the RAW data.
Lens correction/Automatic distortion correction using JPEG
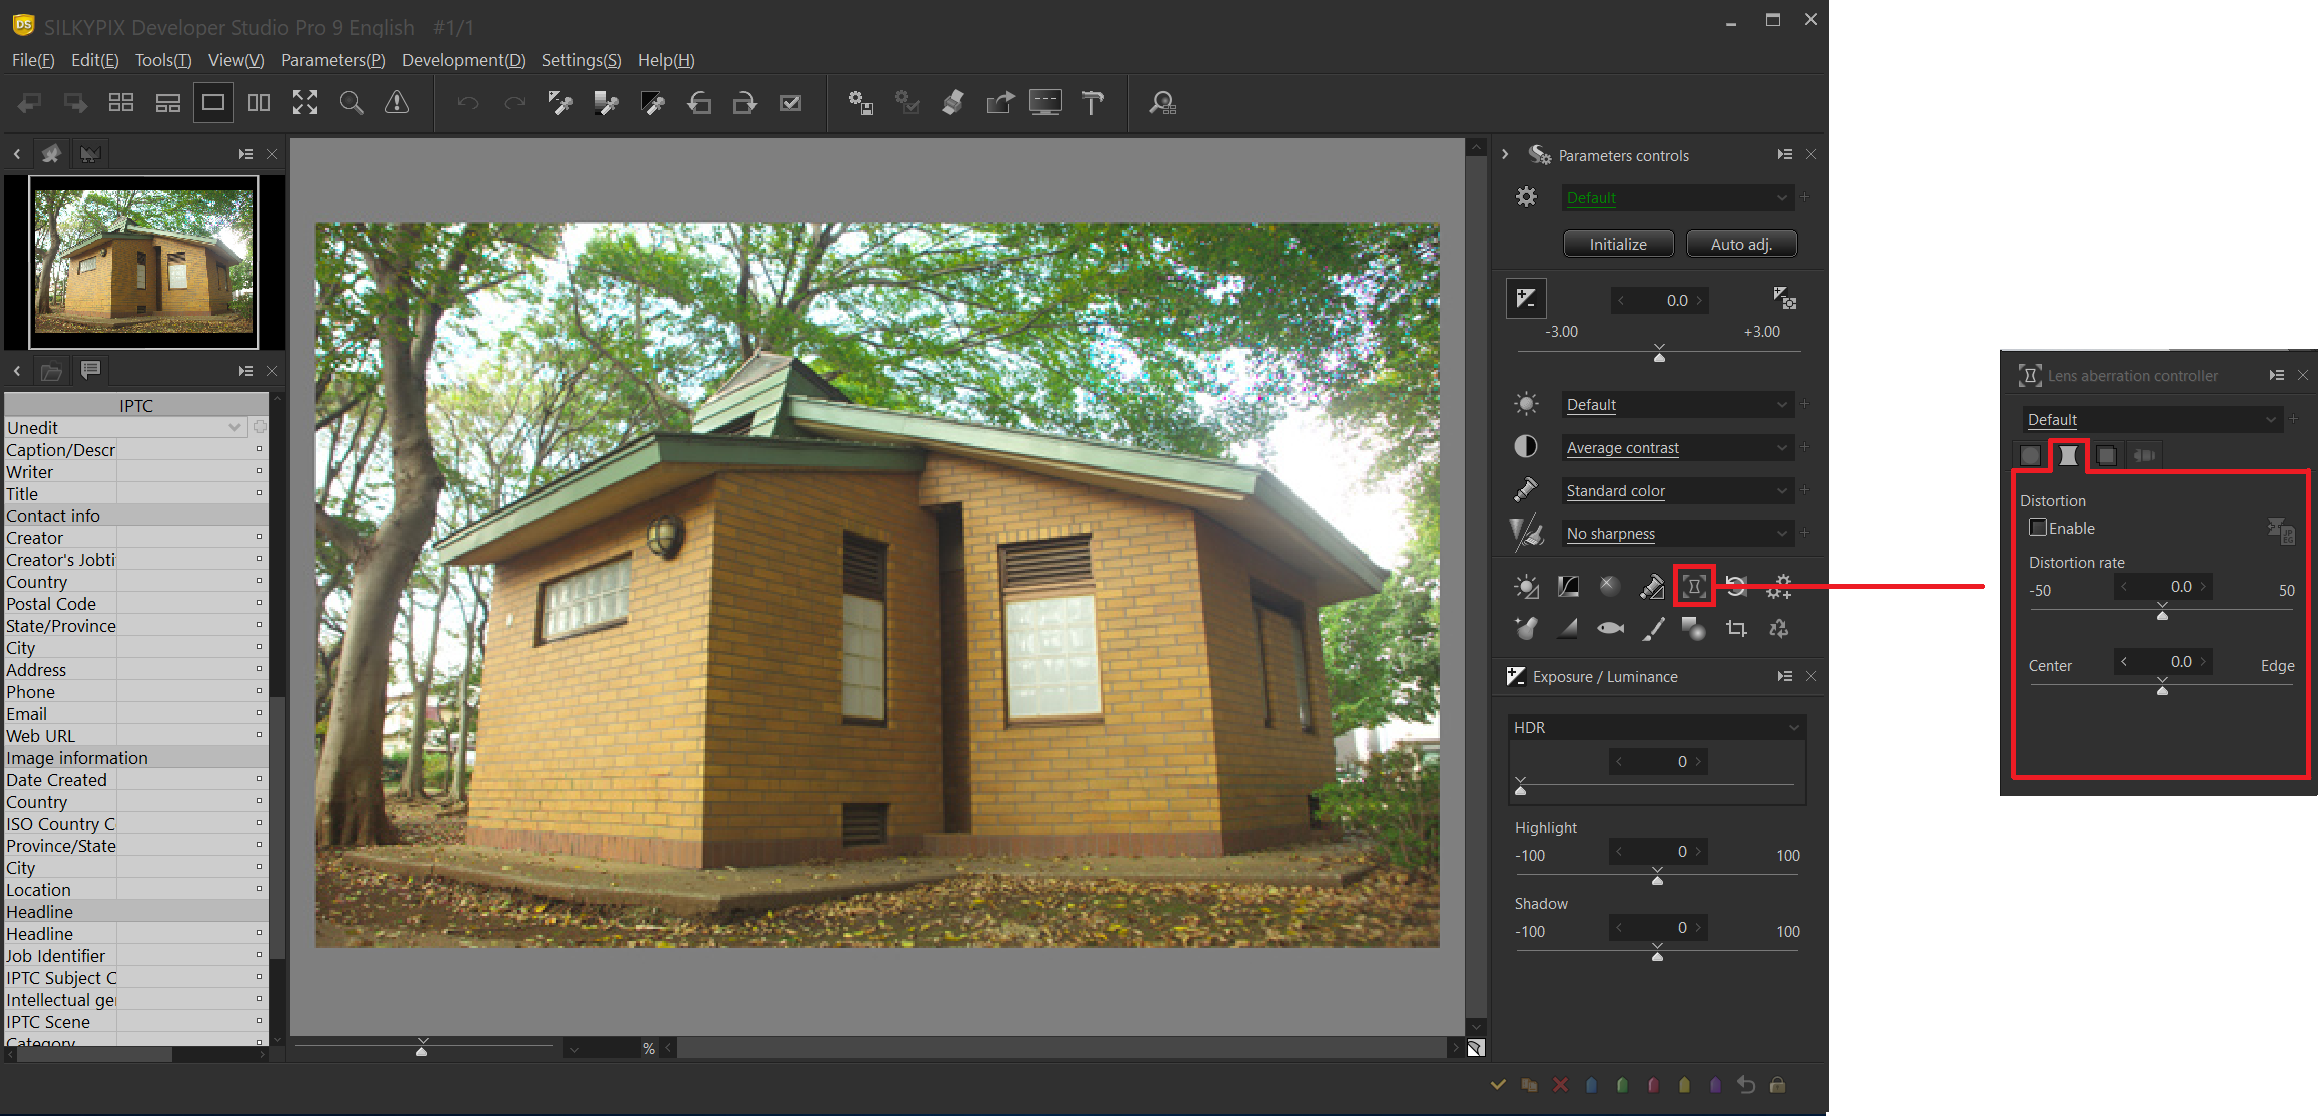
Automatic distortion correction using JPEG is located in the Distortion tab in the Lens aberration correction sub-control icon. You can use this feature under the following conditions:
- The aspect ratio of the simultaneous recording JPEG must be the same as the aspect ratio of the RAW data.
- The number of pixels of the simultaneous recording JPEG must be the same as the number of pixels of the RAW data.
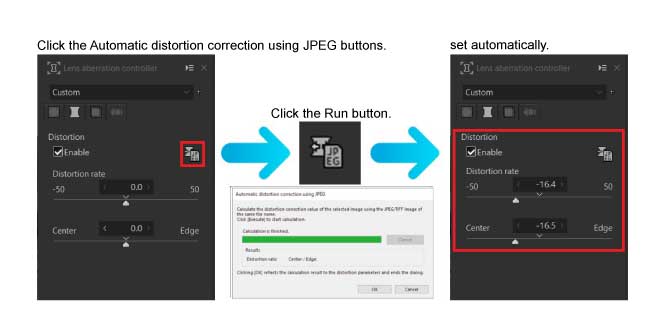
First, Select the Automatic distortion correction using JPEG button. Next, the Automatic distortion correction using JPEG Window appears. When the calculation is completed and the correction value has been calculated, click [OK]. Finally, the distortion curvature and center/perimeter focus parameters are automatically set.
Fine adjusting the manually
If you want to fine-tune the corrected results, adjust the parameters of “Distortion rate” and “Center”.
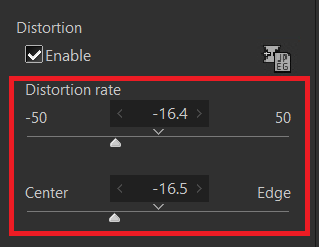
Distortion rate
Adjust barrel or pincushion distortion and their compensation.
Center
Adjust whether the correction is done with emphasis on the center of the screen or the correction is done with emphasis on the peripheries.
When the correction value cannot be calculated
“Automatic distortion correction using JPEG” calculates correction values by comparing patterns of JPEG and RAW data. For this reason, the correction value may not be calculated depending on the picture pattern. In this case, click [Cancel] to correct the distortion manually.
Example of the case where the correction value cannot be calculated
- When many similar periodic patterns are included in a image.
- When there are few subjects with outlines in a image.
- When the outline of the subject is blurred by a flare caused by backlight.
- If an image-processing filter or color-conversion mode with a large change in color or picture pattern has been set for the simultaneous recording JPEG (a mode with less exaggeration such as neutral or standard is recommended)
Example1
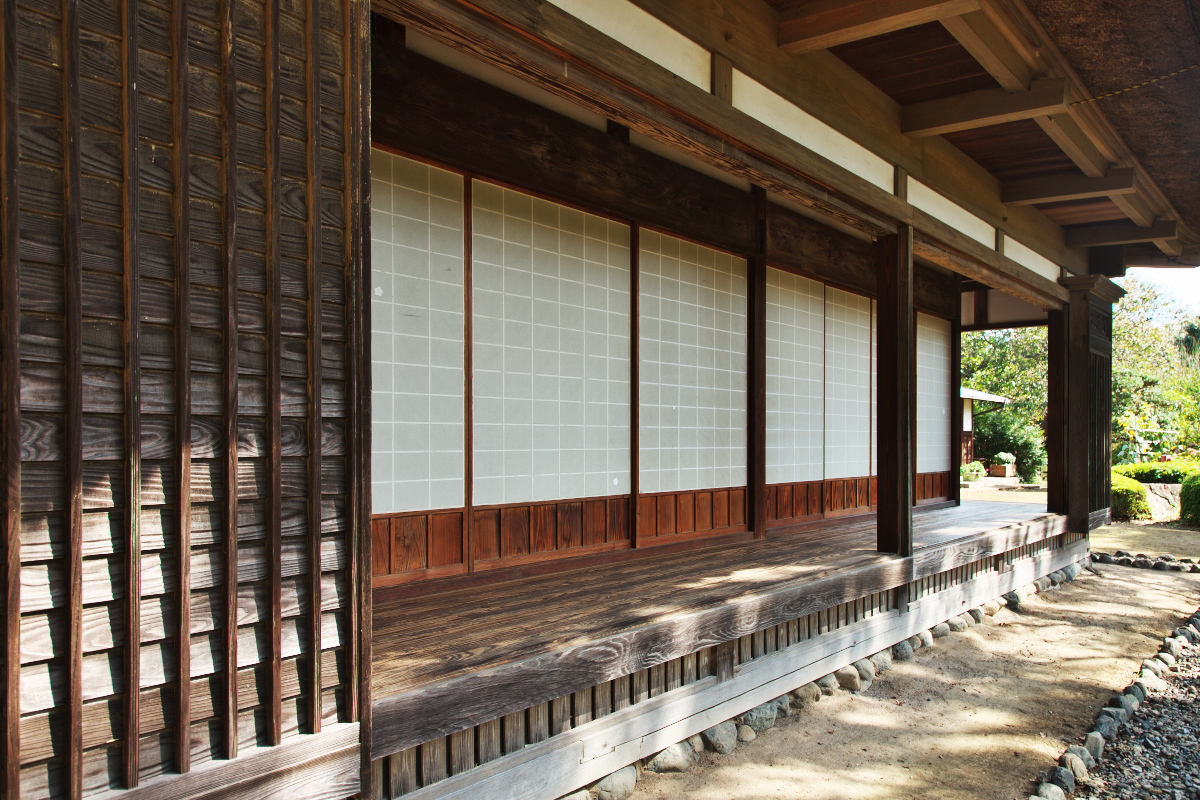
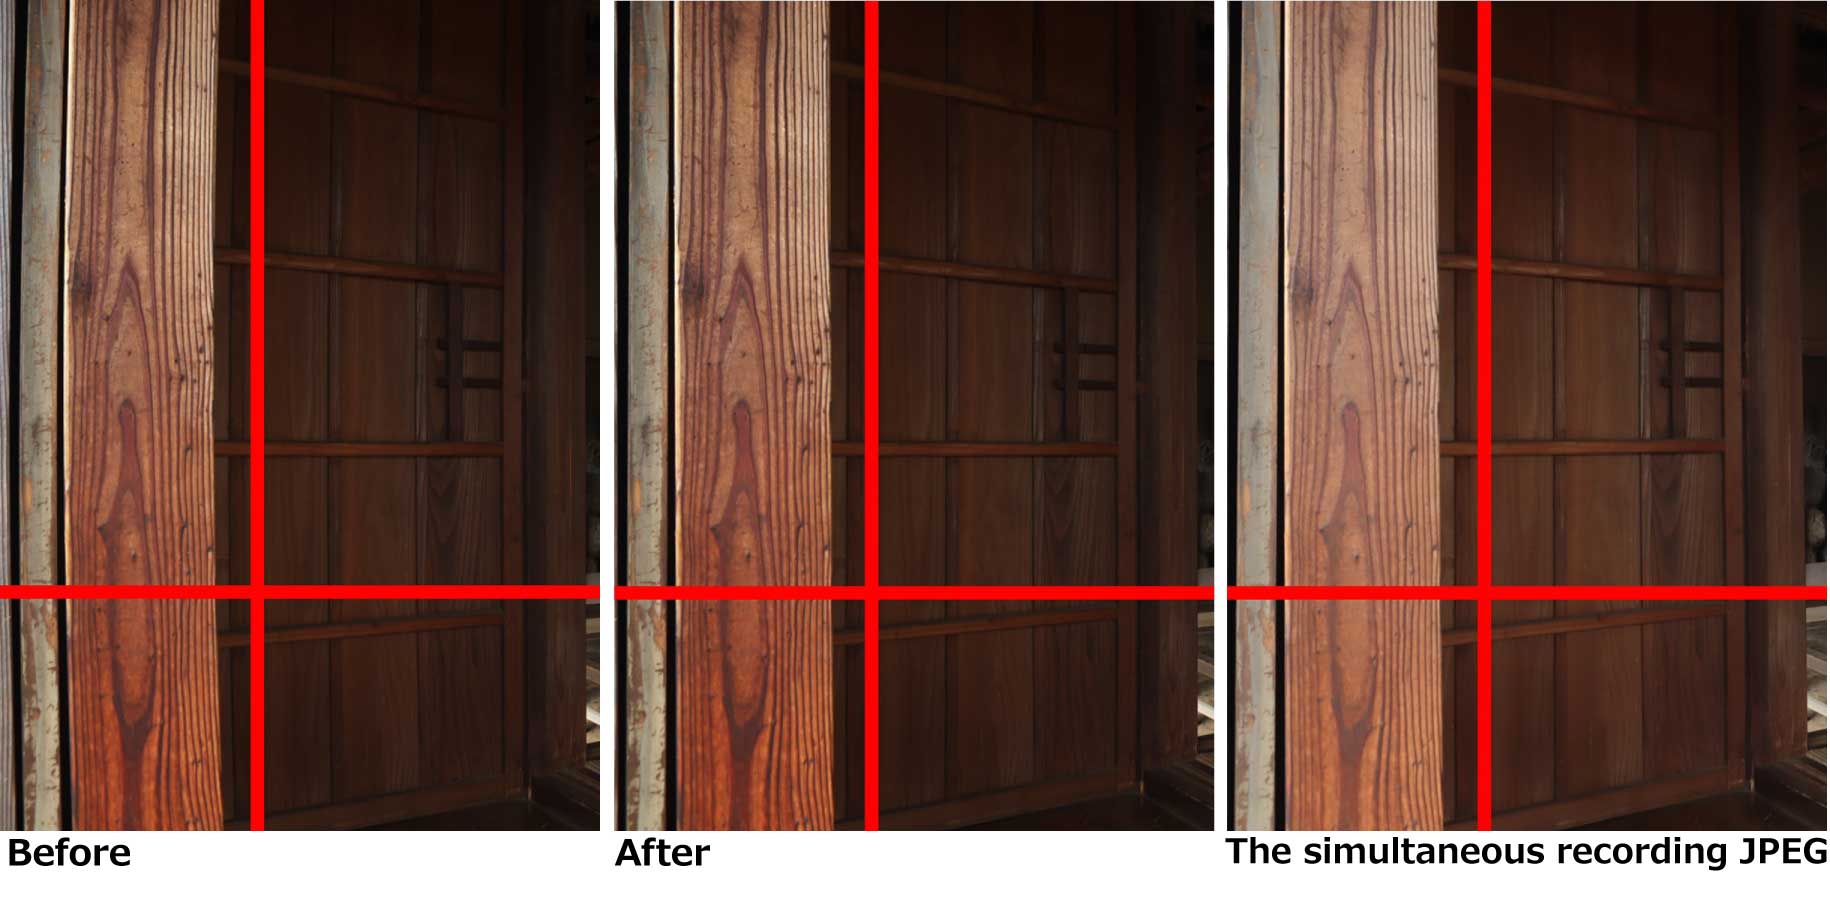
Distortion may be a problem for subjects with many horizontal and vertical straight lines, such as buildings. Correcting this eliminates visual discomfort.
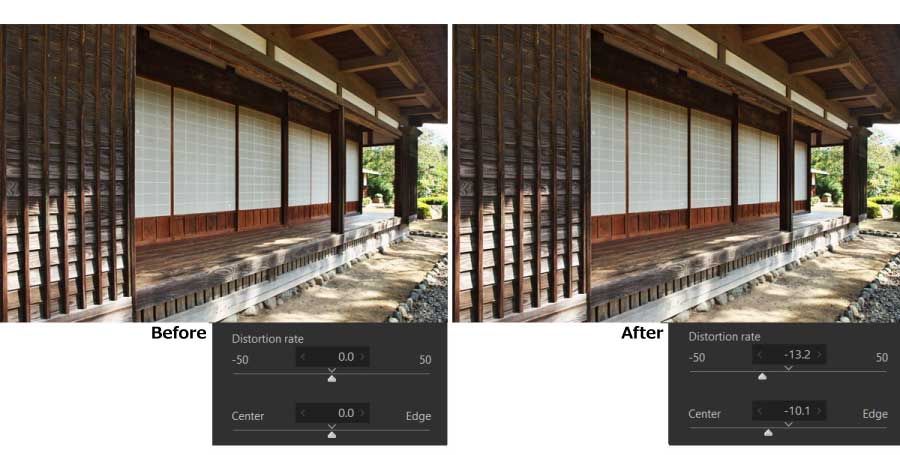
Zoom in on part.
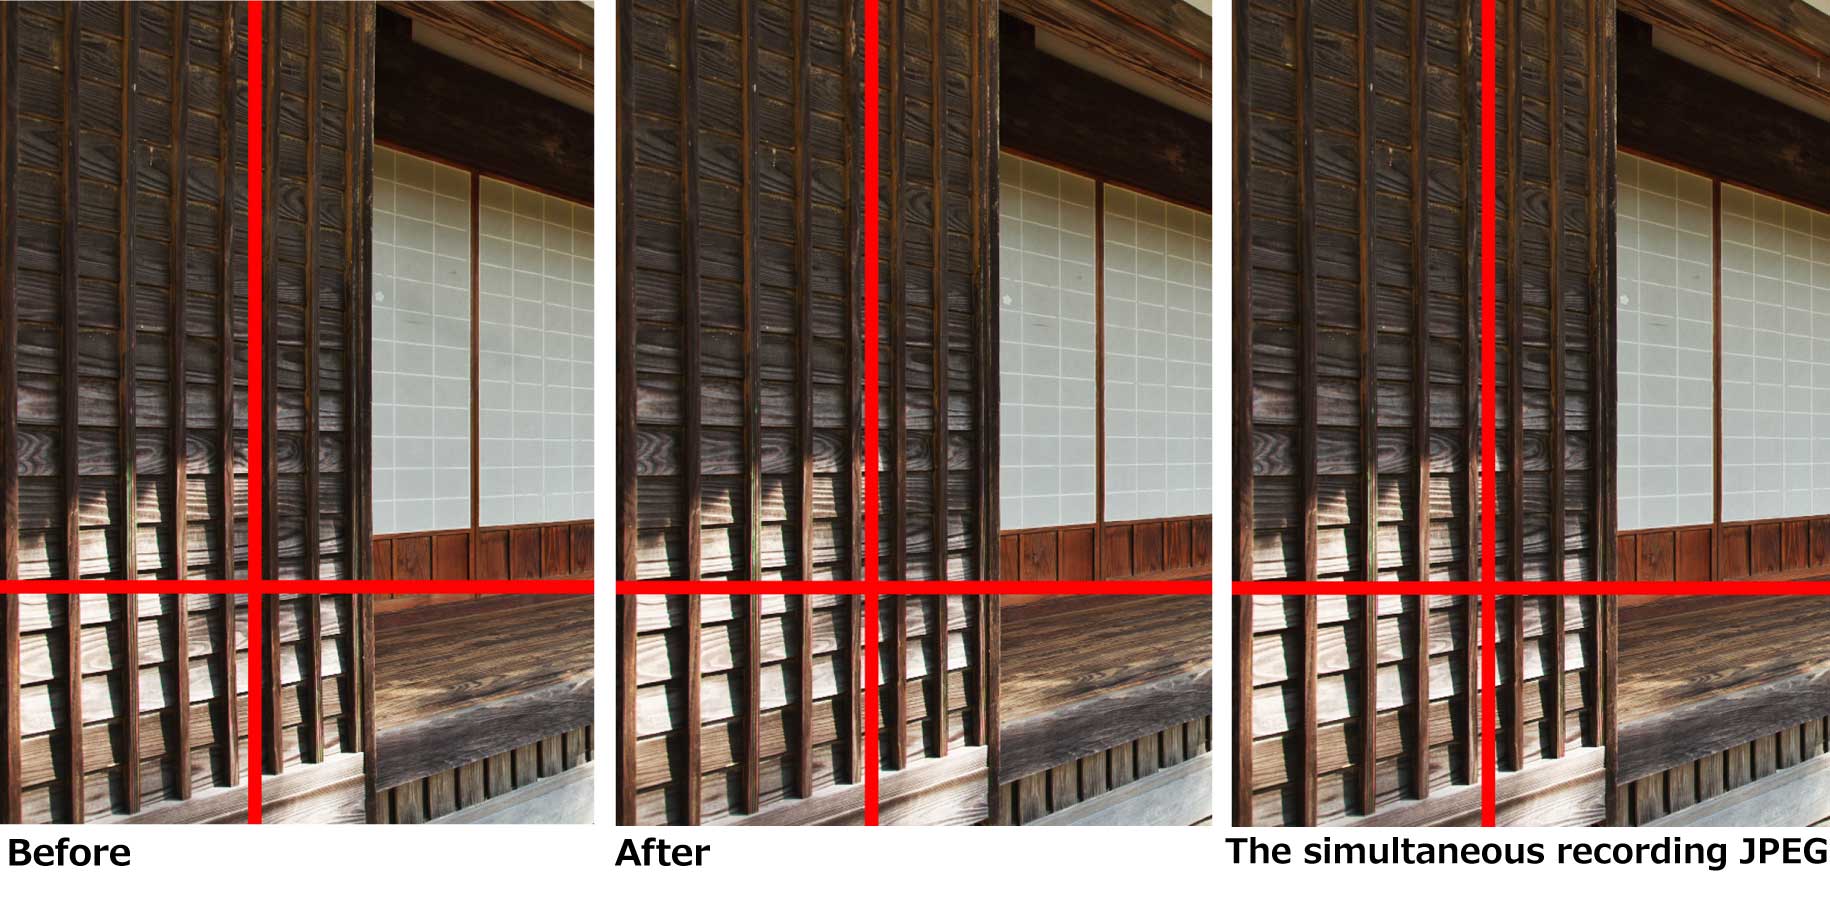
The distortion is corrected in the same way as in the JPEG of simultaneous recording.
Example2
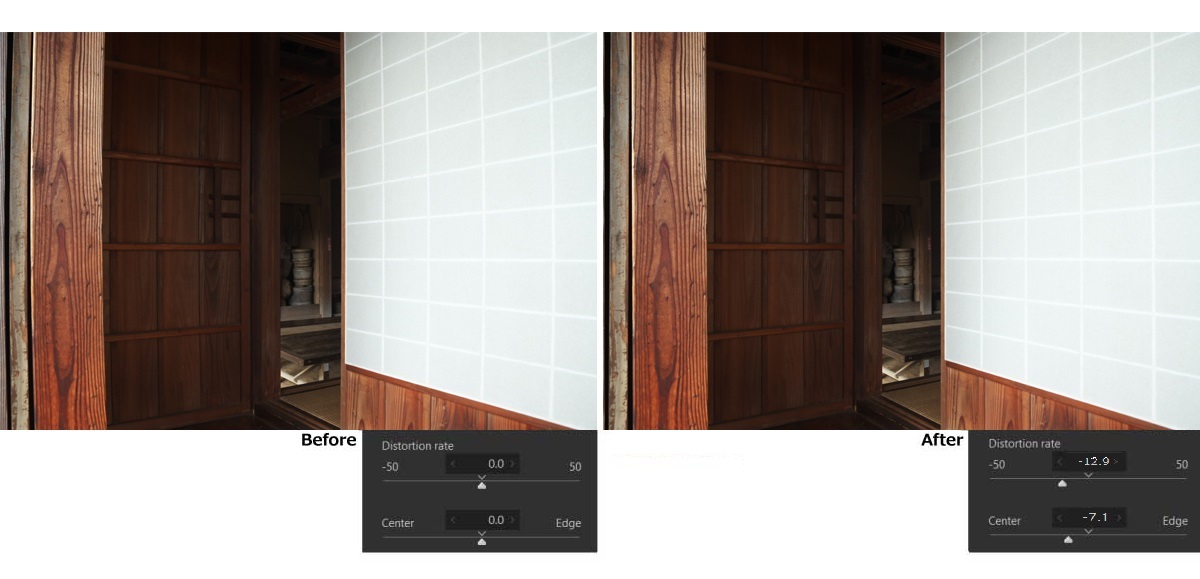
Zoom in on part.
Please try it out with your images!
 Go Back
