Feb 10, 2022
Super resolution / Multiple exposure (moving object)
We introduce the new composite modes “Super resolution” and “Multiple exposure (moving object)” of the SILKYPIX Developer Studio Pro11 and later.
With the addition of “Super resolution” and “Multiple exposure (moving object),” the number of compositing modes of the SILKYPIX professional edition has increased to eight.
Composite modes
- Multiple exposure
- Multiple exposure (night view)
- Multiple exposure (moving object)
- Lighten composite
- Moving object removal
- Stroboscopic motion
- Depth of field composite
- Super resolution
About the six composite modes, please see here.
Super resolution
Super resolution provides an amazing resolution that SILKYPIX has never been able to express before.
In SILKYPIX’s “Super resolution,” the pixel count is selected at a 1.5x or 2xs rate and amplified, providing precise placement adjustments at the half-pixel level to create a high definition image. This is due to utilizing the feature point detection technology and the image coincidence detection apparatus (Patent No. 4689758). Even if the single image doesn’t have defined outlines, by having multiple layers, it is possible to produce a high definition image.
The number of pixels is large, so you can express a high resolution even when printing or trimming large images.
How to use the Super resolution
First, select the image you want to combine in the Adjustment section.
To select the image you want to combine, hold down the [Ctrl] key while clicking with the mouse on the image. White frames will appear on selected images. Those are the images to be composited.
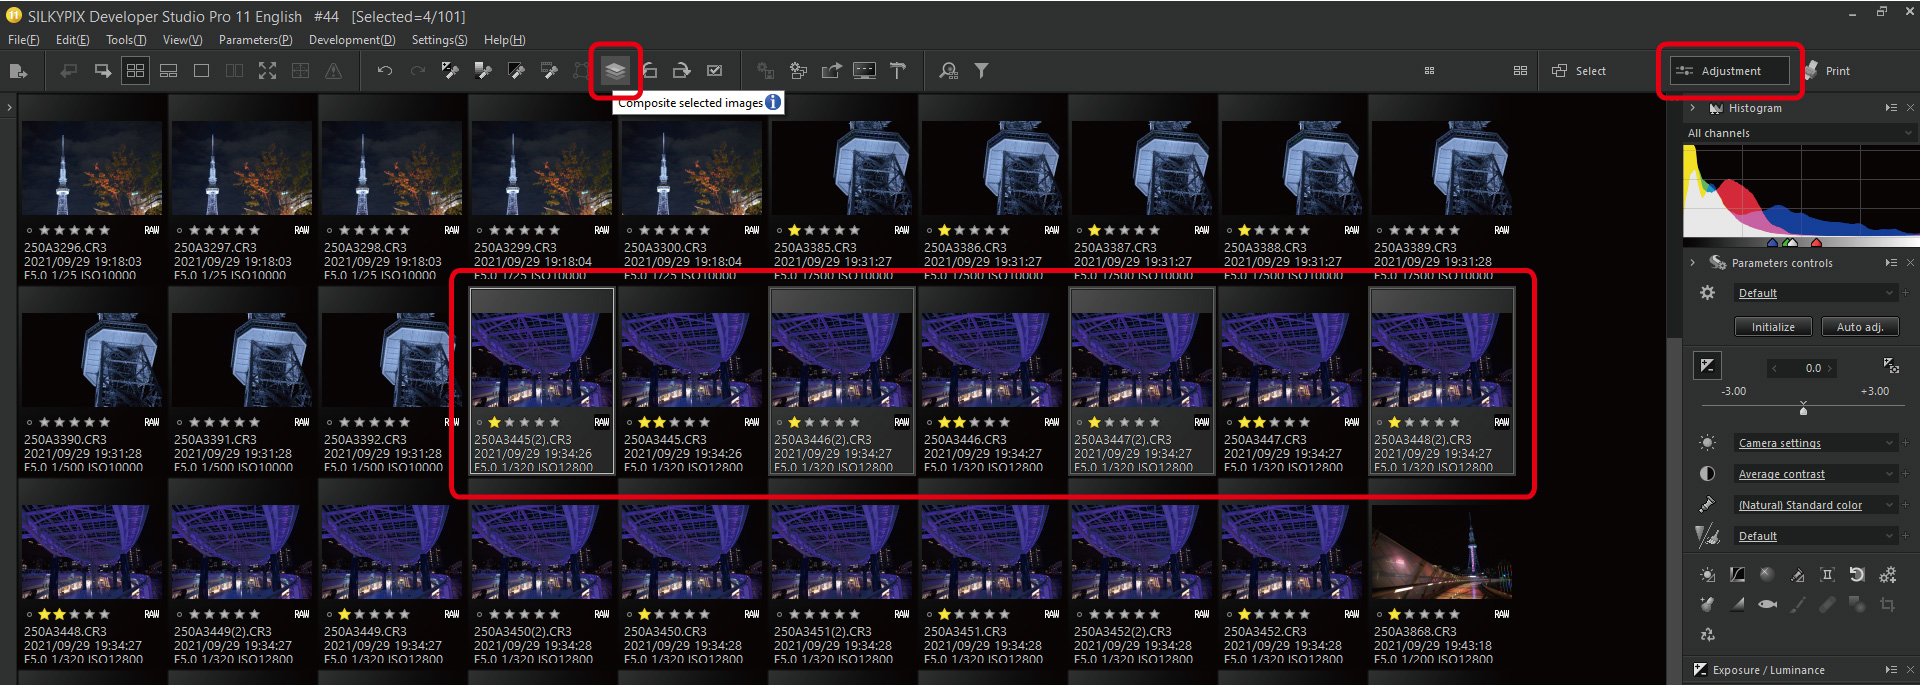
When you have selected images, click the [Composite selected images] button on the toolbar. Click this button to display a screen like the one shown below.
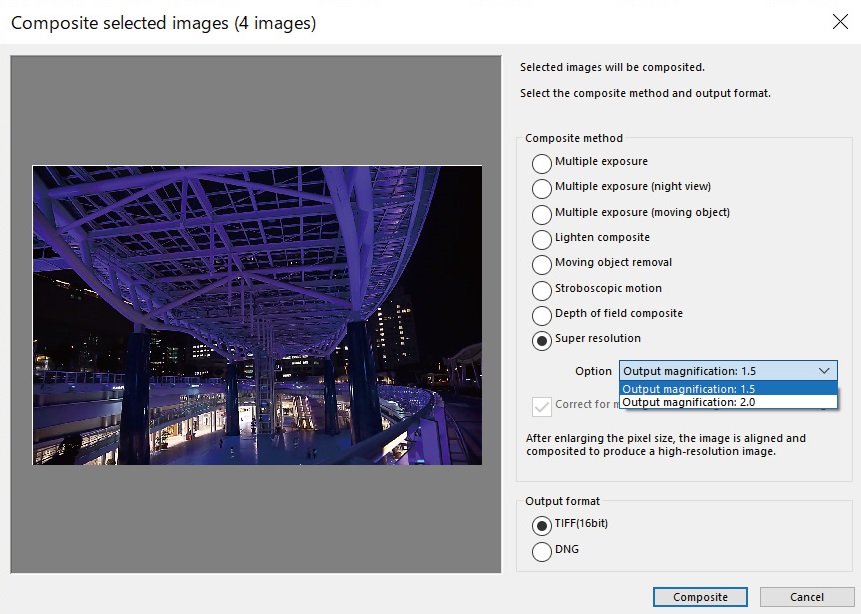
After selecting the Super resolution, select the option [Output magnification: 1.5] or [Output magnification: 2.0] (default). The higher the output magnification, the higher the resolution. However, even the [Output magnification: 1.5] resolution is sufficient.
Then select TIFF (16bit) or DNG as the format.
Depending on the output format, the handling of the development parameters applied to the selected image during composition differs. For more information, see here.
When you have selected all of them, click [Composite].
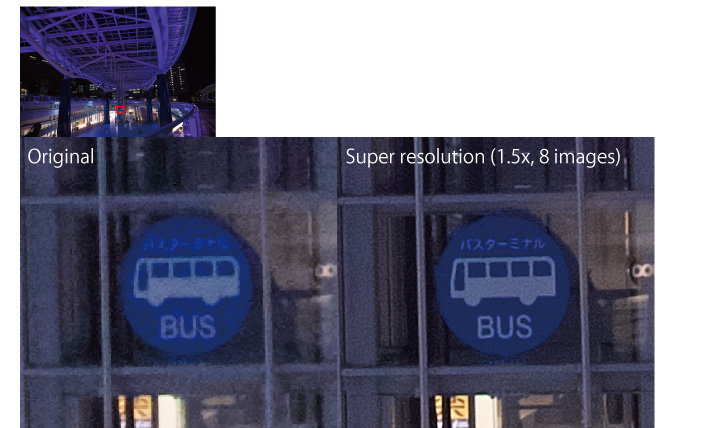
This is the result of compositing eight images. The text was hard to read in the original image. I was able to make it clearer by compositing images. The higher the number of images, the clearer the image will be, but it will take longer to composite.
By the way, here is the result of a composite with four images. There is a little more noise than eight images, but the resolution is much better than one original image.
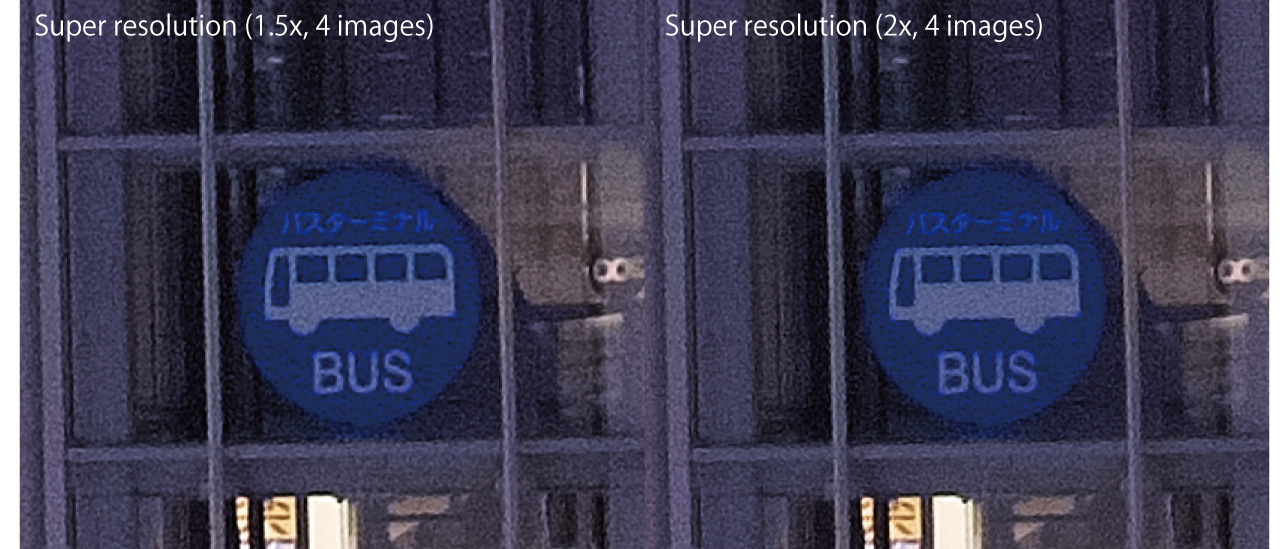
Example
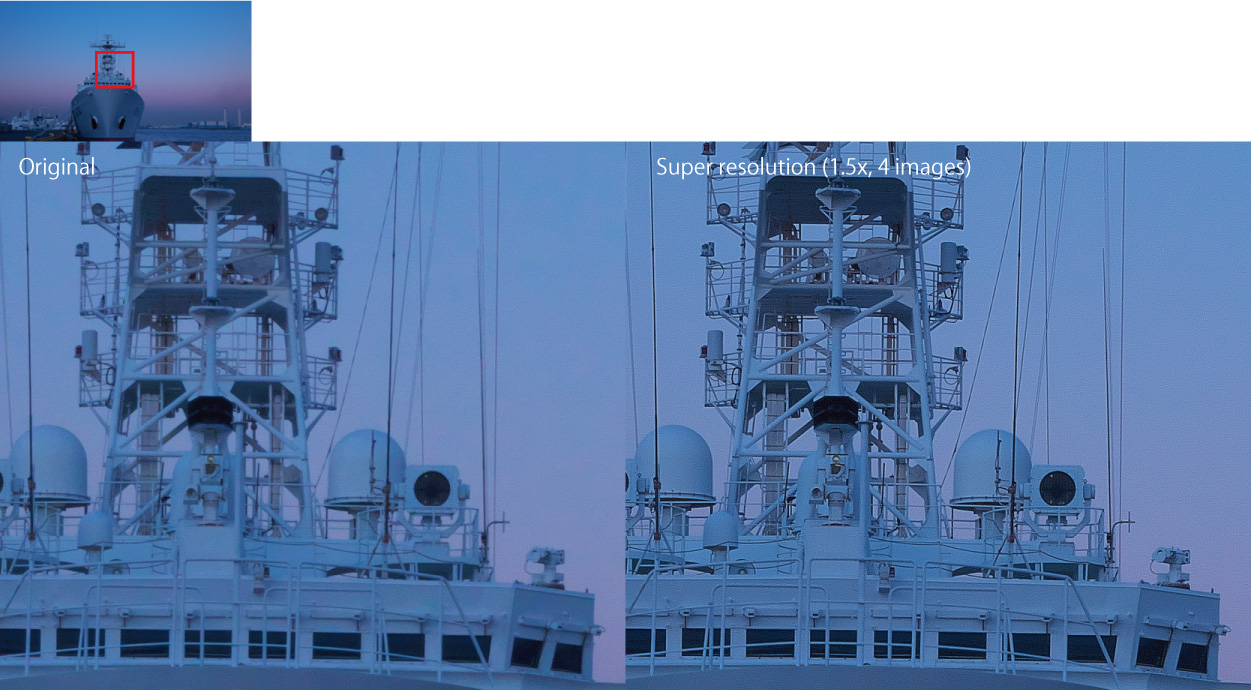
It also works with JPEG data. If you are concerned about the capacity of your memory card, please try using JPEG.
Multiple exposure (moving object)
In a standard multi exposure composite, when taking rapid shots of moving objects the composite results from those layers have some misalignment. By using the new “Multiple exposure (moving object)” feature to composite, it retains the object from the base image and eliminates the other moving elements from the composite results. It also reduces the amount of noise.
How to use the Multiple exposure (moving object)
Select images you want to composite in the same way as the Super resolution.
The feature of Multiple exposure (moving object) is that only the subject in the representative image is left after compositing, so it is selected from the representative image. Normally, the first image selected is the representative image.
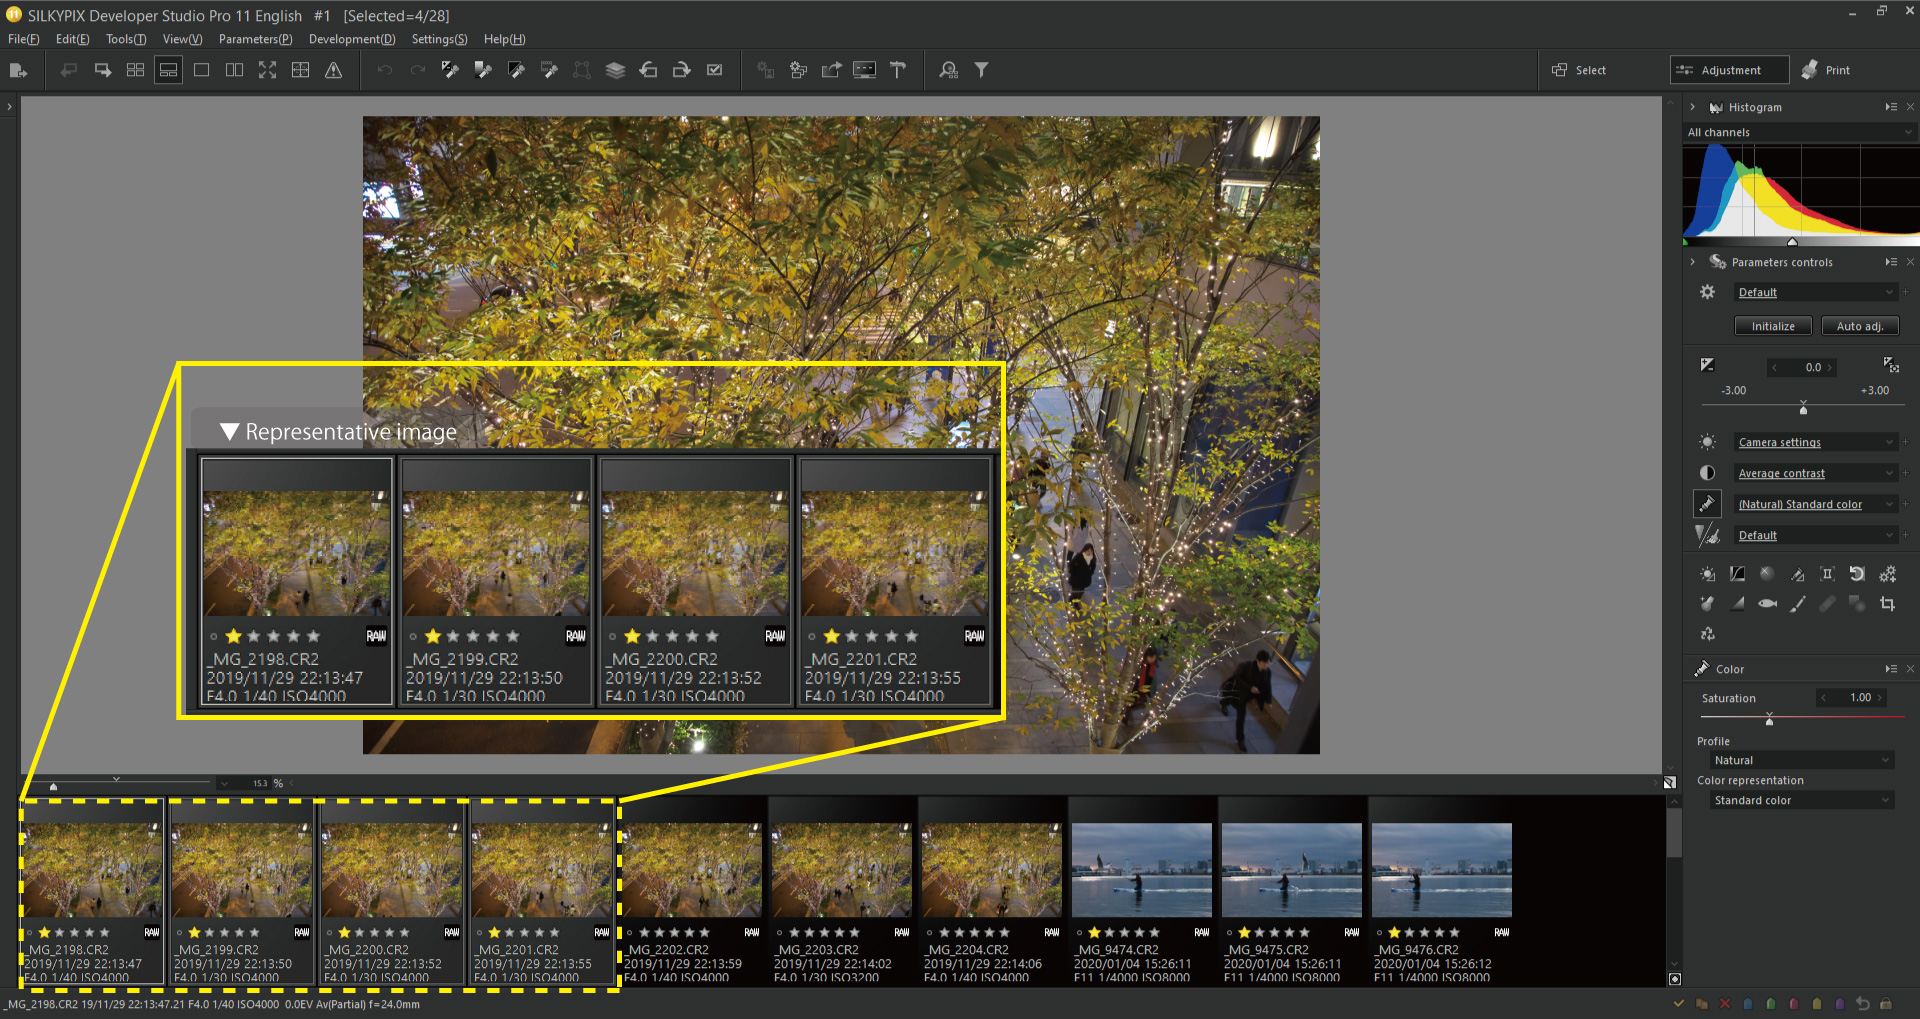
In the above image, the leftmost frame of the four selected images is the representative image. You can use the arrow buttons on the keyboard to select a representative image.
Now, let’s compose the image.
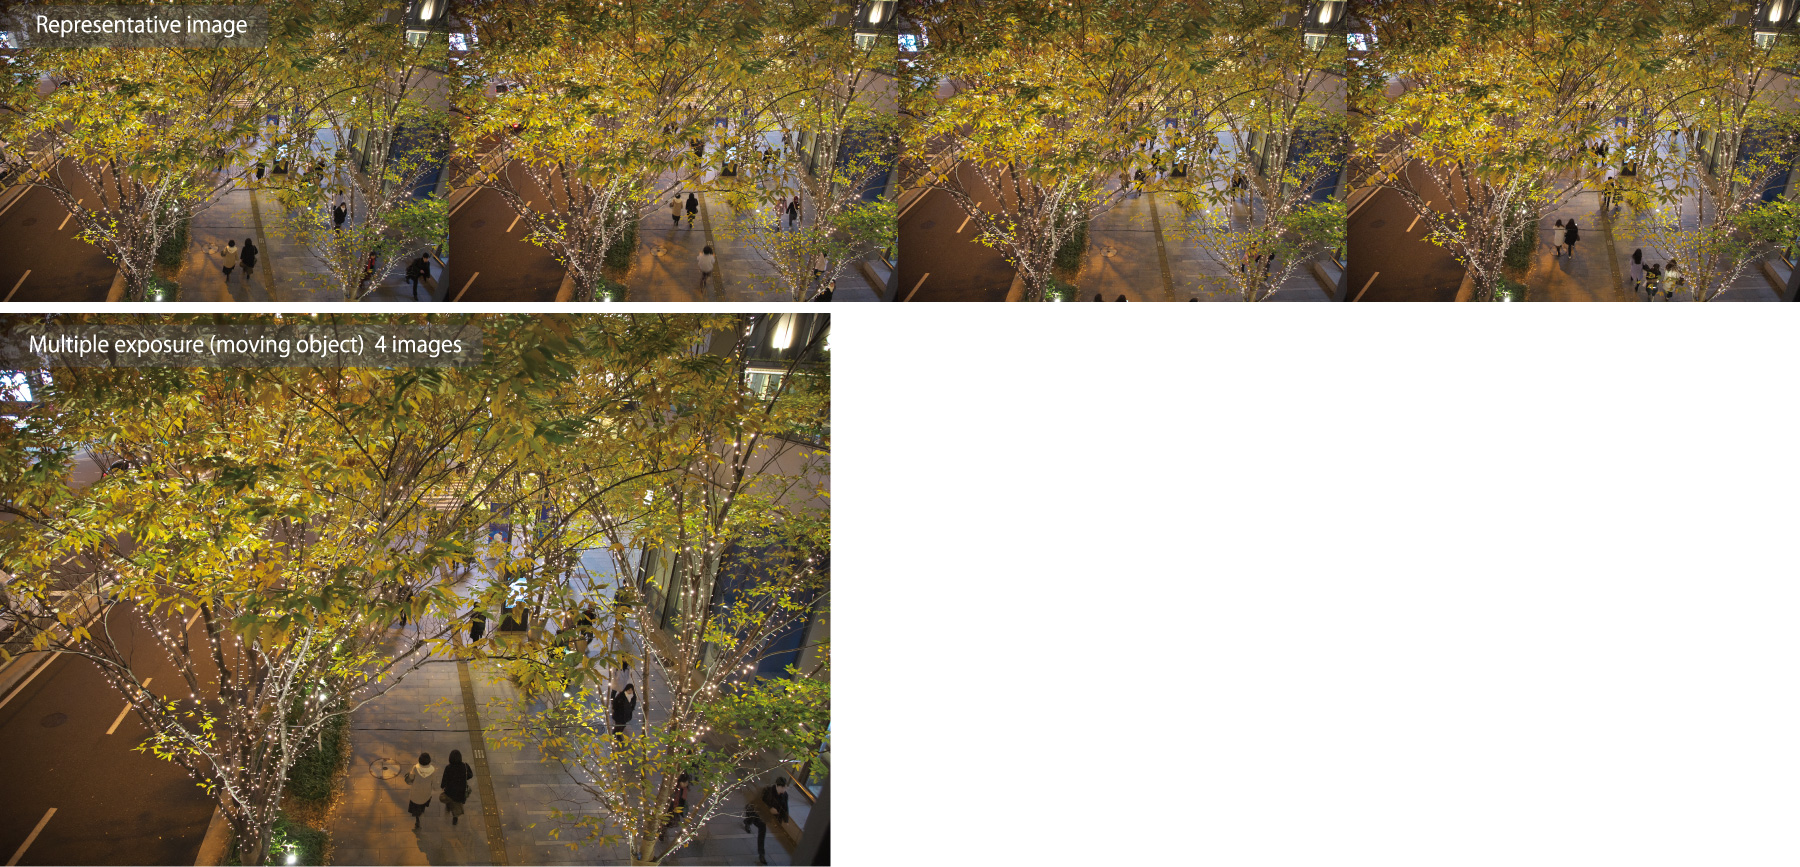
The composited image is created by leaving the subject in the representative image and erasing the other moving subjects.
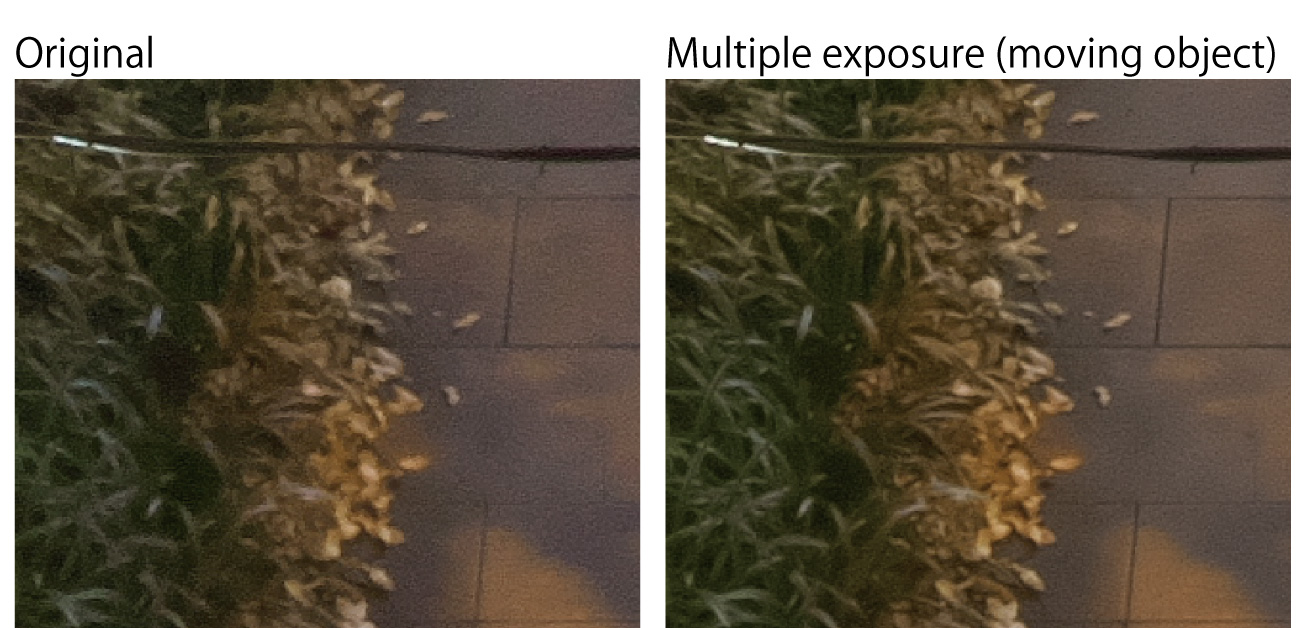
By checking the “Correct for misalignment during hand-held shooting” box when composing, you can align the image. It also reduces noise.
Example


I took a series of shots of birds flying in this way and select the image with the composition I thought was best as the representative image. I used a high sensitivity to prevent the birds from blurring, which resulted in some noise. However, I was able to mitigate the noise by compositing the images.
You can try the SILKYPIX for 30 days, free of charge.
 Go Back
